会议室预定系统:Google 账号登录后端开发
我们的网站实现了用户名密码登录,用户忘记了密码也可以通过邮箱验证码来修改密码,之后再登录。
这样功能上没问题,但是不方便。
用户会访问很多个网站,如果每个网站都需要注册一个账号,那对于不常用的网站,很容易忘记账号密码。
解决方式就是支持三方账号登录。
比如 dockerhub 的登录:
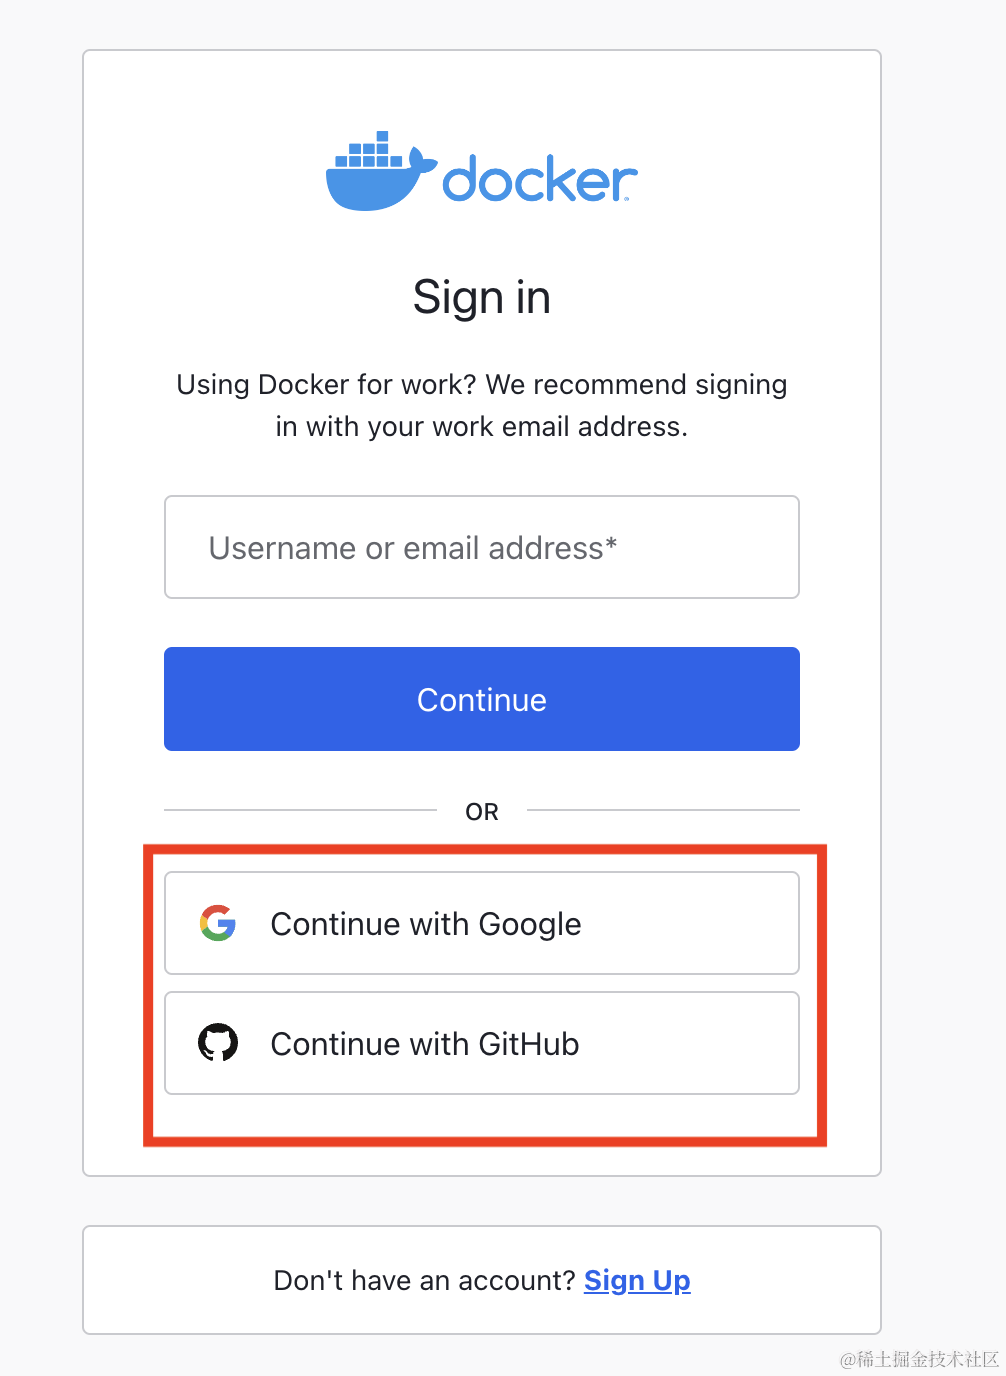
你可以登录 google、github 账号,然后授权,这样 dockerhub 网站就可以自动登录了。
根本不需要单独的账号密码。
原理就是他用你 github、google 的信息来给你创建了一个账号,之后只要是同样的 github、google 信息就可以自动登录了。
当你第一次授权的时候:
会跳到这个页面:
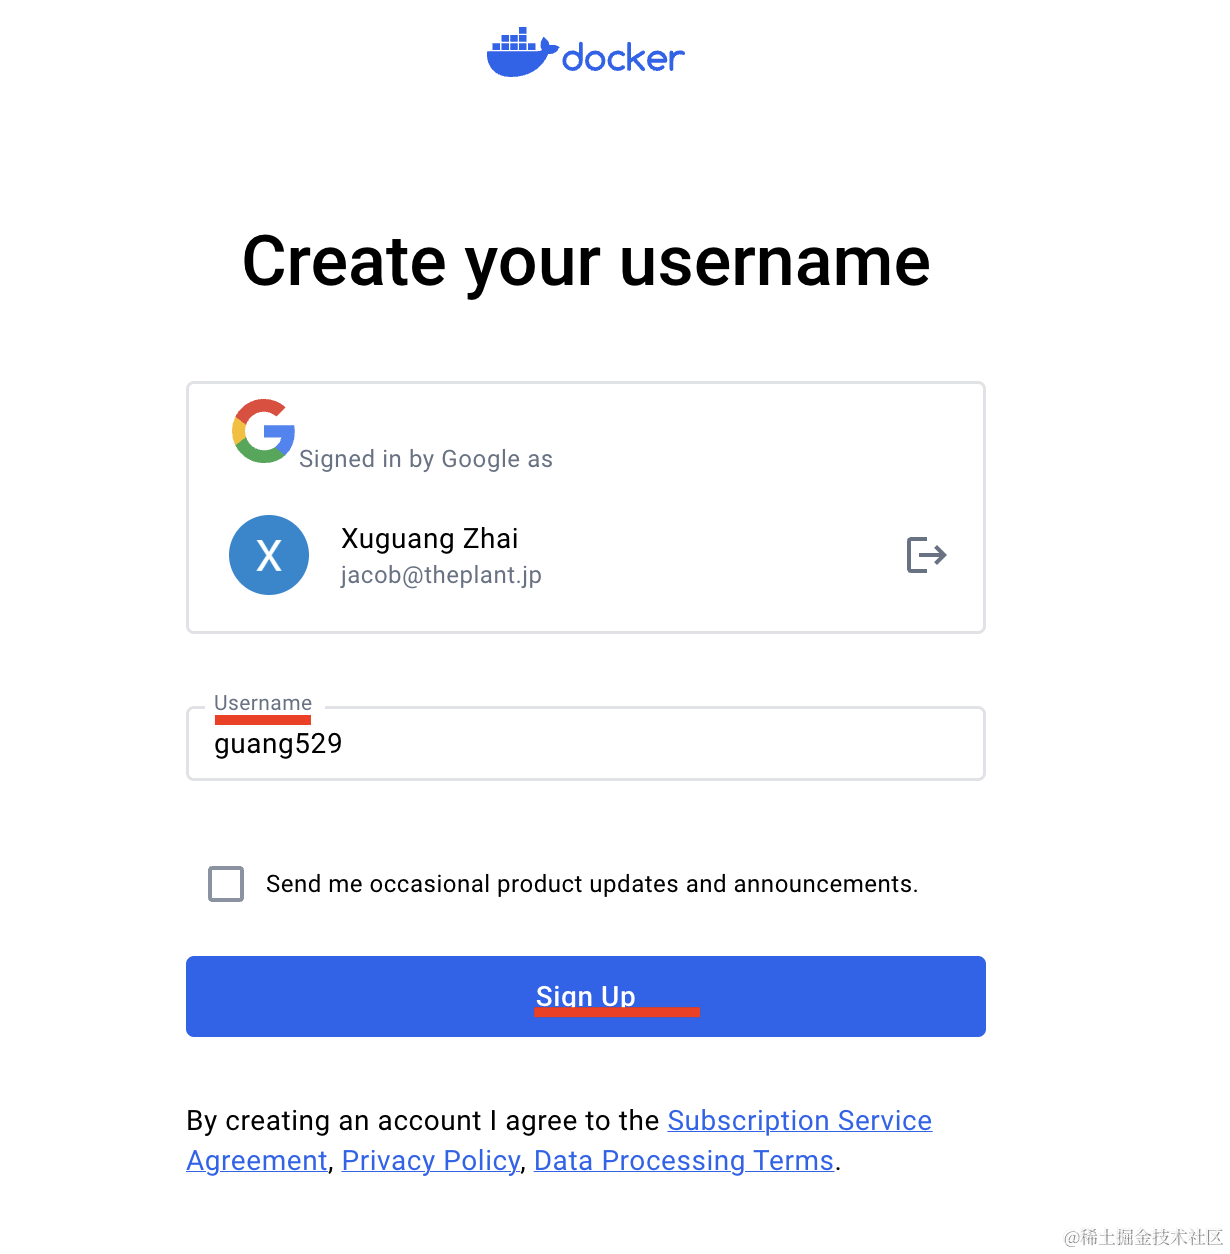
因为缺少了 username 的信息,你填上之后就可以注册了。
并且它还自动给你登录了:
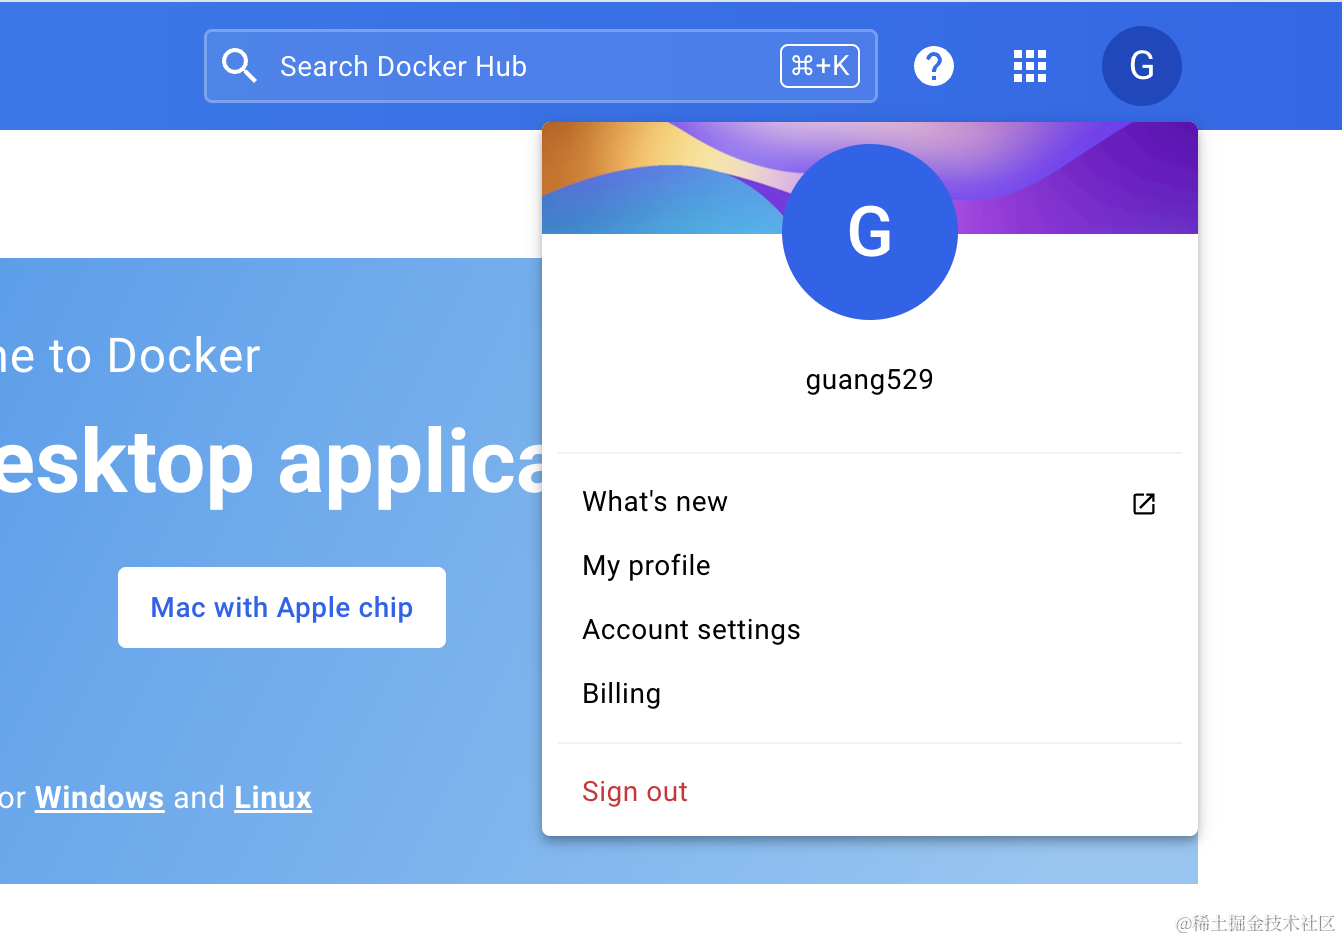
然后退出登录用 google 账号登录一次:
因为你授权过,短时间内不需要再次授权,于是就直接登录了。
感受下现在的登录体验。
需要记住用户名密码么?
不需要。
你只需要点下 google 登录,然后授权,就自动登录了。
我们也在会议室预定系统里集成下 google 登录。
会用到 passport-google 的策略来做三方登录,所以要集成 passport。
进入 backend 项目,安装 passport 的包:
npm install --save @nestjs/passport passport
安装用户名密码认证的 passport-local 策略包:
npm install --save passport-local
npm install --save-dev @types/passport-local
然后创建一个认证模块:
nest g module auth

添加用户名密码认证的策略 auth/local.strategy.ts
import { Strategy } from "passport-local";
import { PassportStrategy } from "@nestjs/passport";
import { Injectable, UnauthorizedException } from "@nestjs/common";

@Injectable()
export class LocalStrategy extends PassportStrategy(Strategy) {
    async validate(username: string, password: string) {}
}
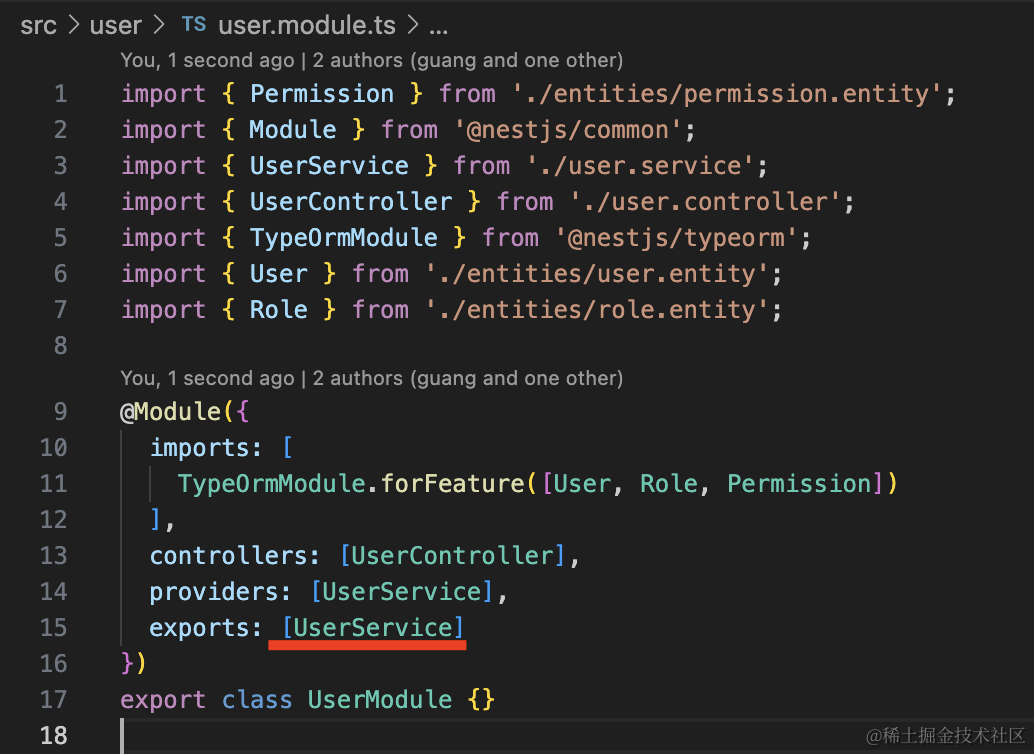
这里需要用到 UserService,在 UserModule 导出一下:
然后 AuthModule 引入 UserModule:
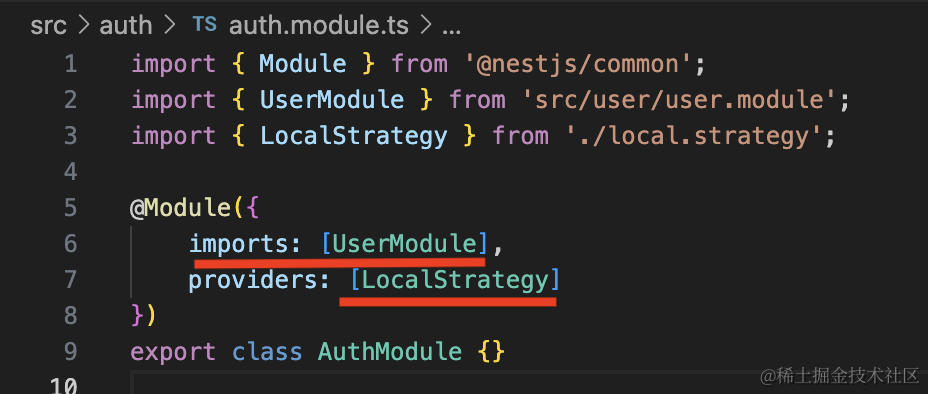
并把 LocalStrategy 声明为 provider。
LocalStrategy 里直接复用 userService.login 来做登录认证:
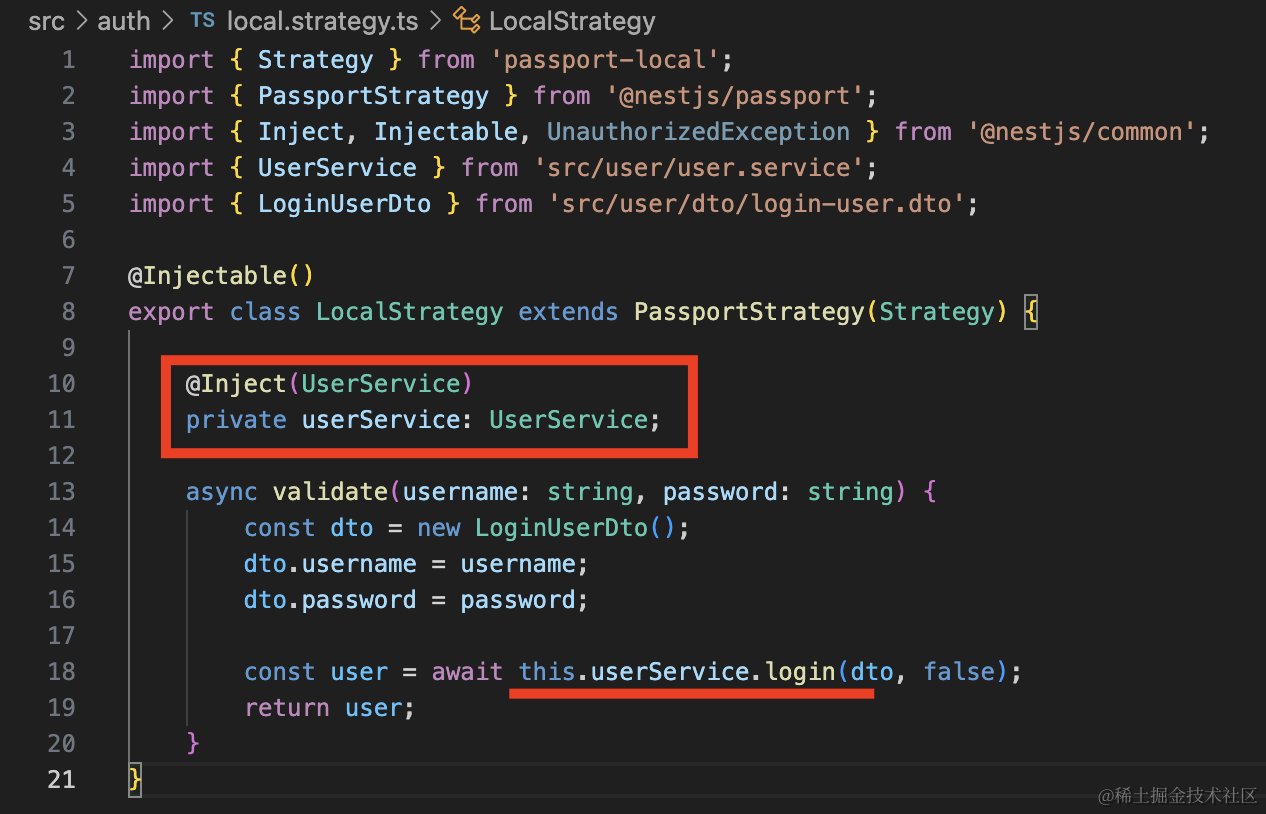
passport 会把返回的 user 信息放在 request.user 上。
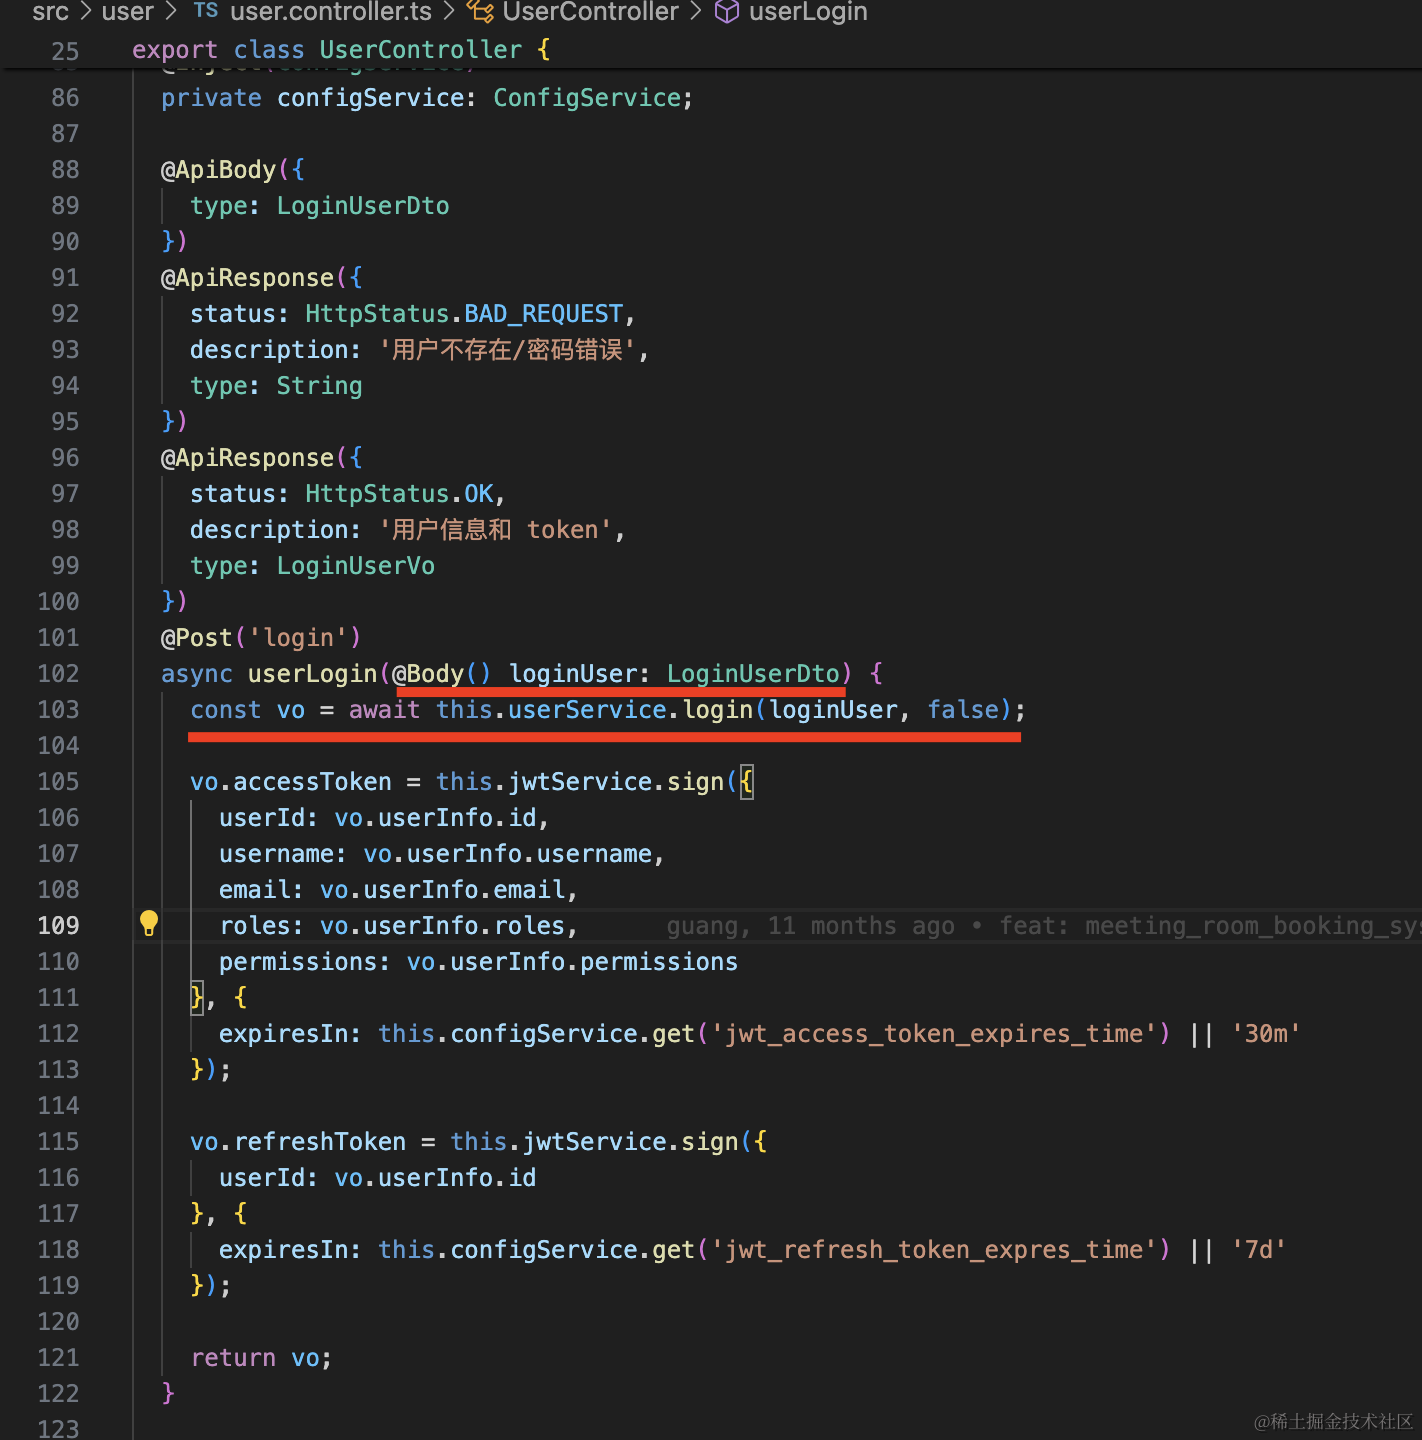
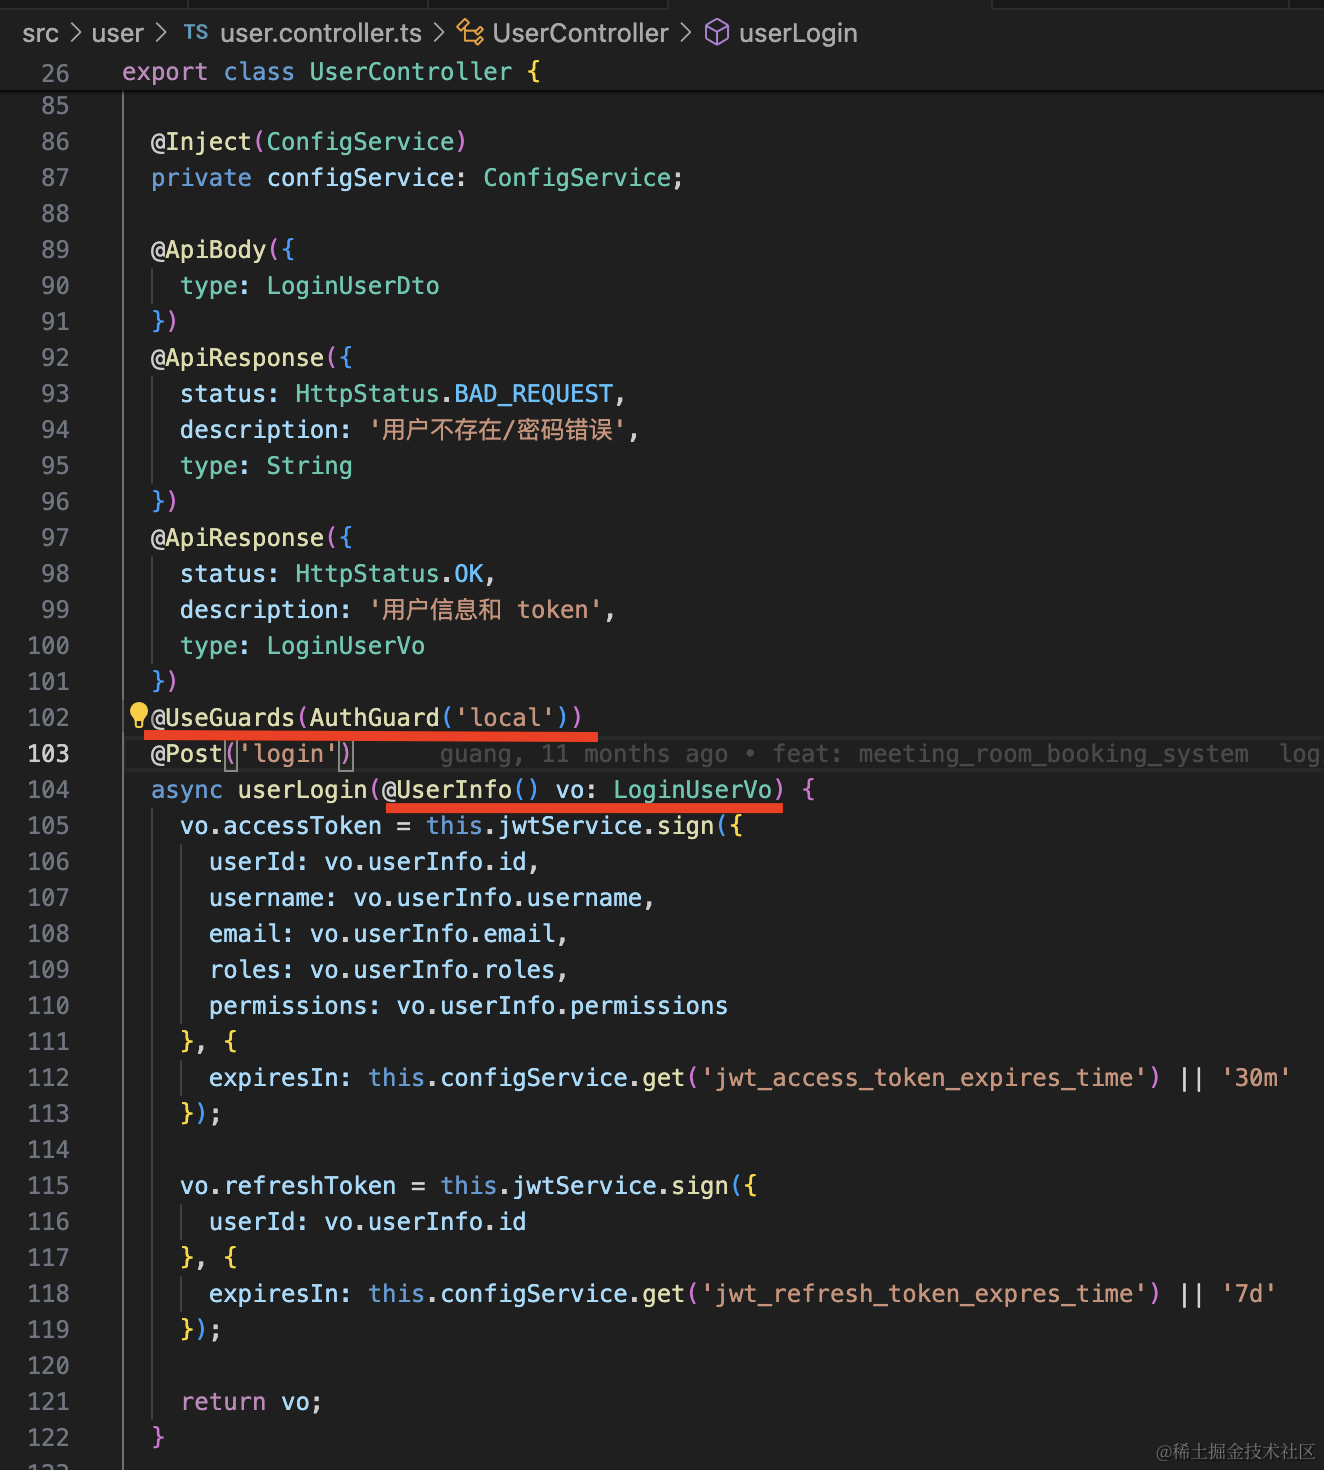
然后 user/login 里就不需要手动调用 userService 了:
改成这样,用 AuthGuard('local') 来做处理即可,处理完从 reqeust.user 里拿 user 信息:
把服务跑起来:
npm run start:dev

然后进入 frontend_user 也把开发服务跑起来:
npm run start
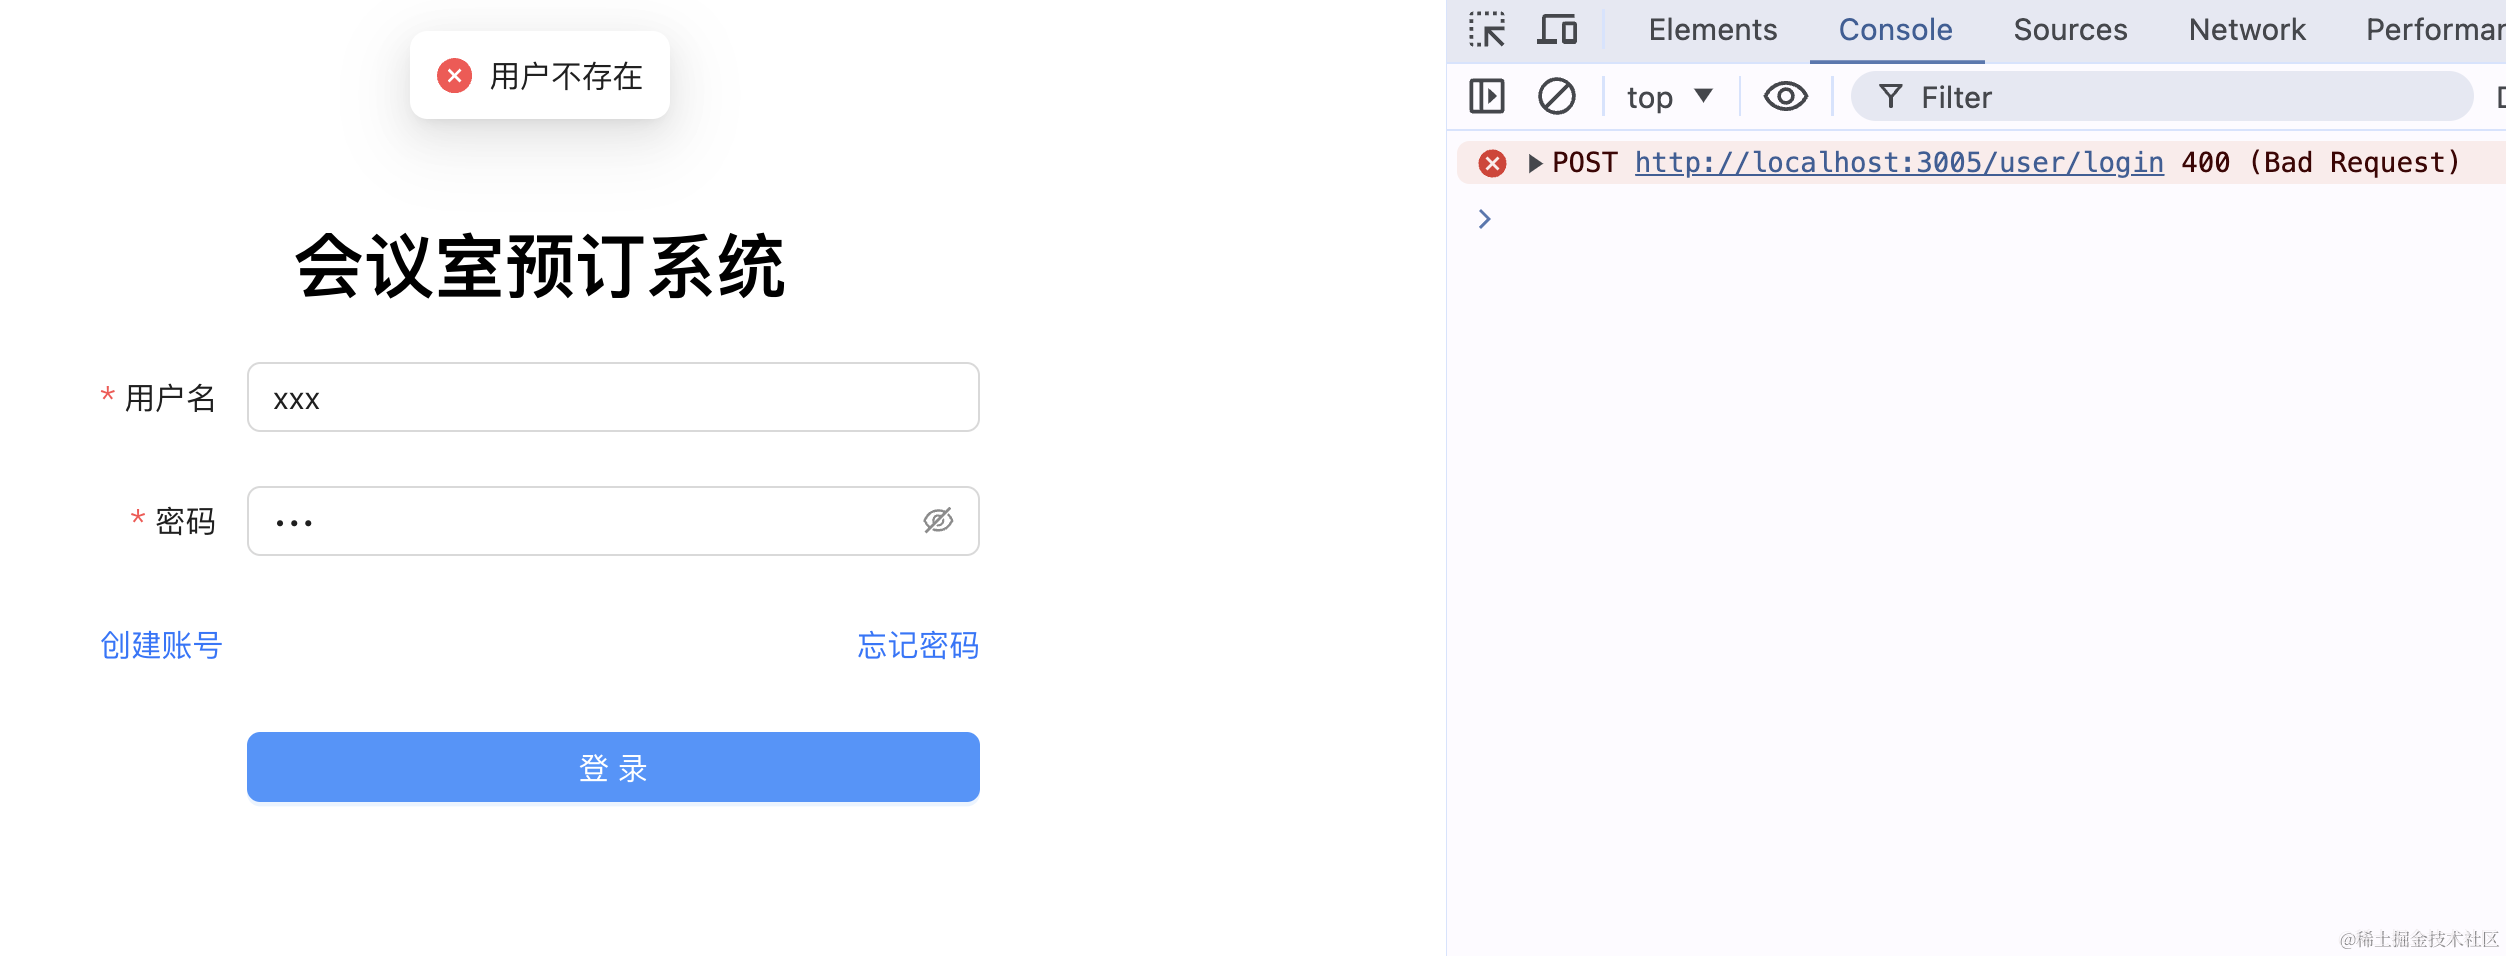
当用户不存在:
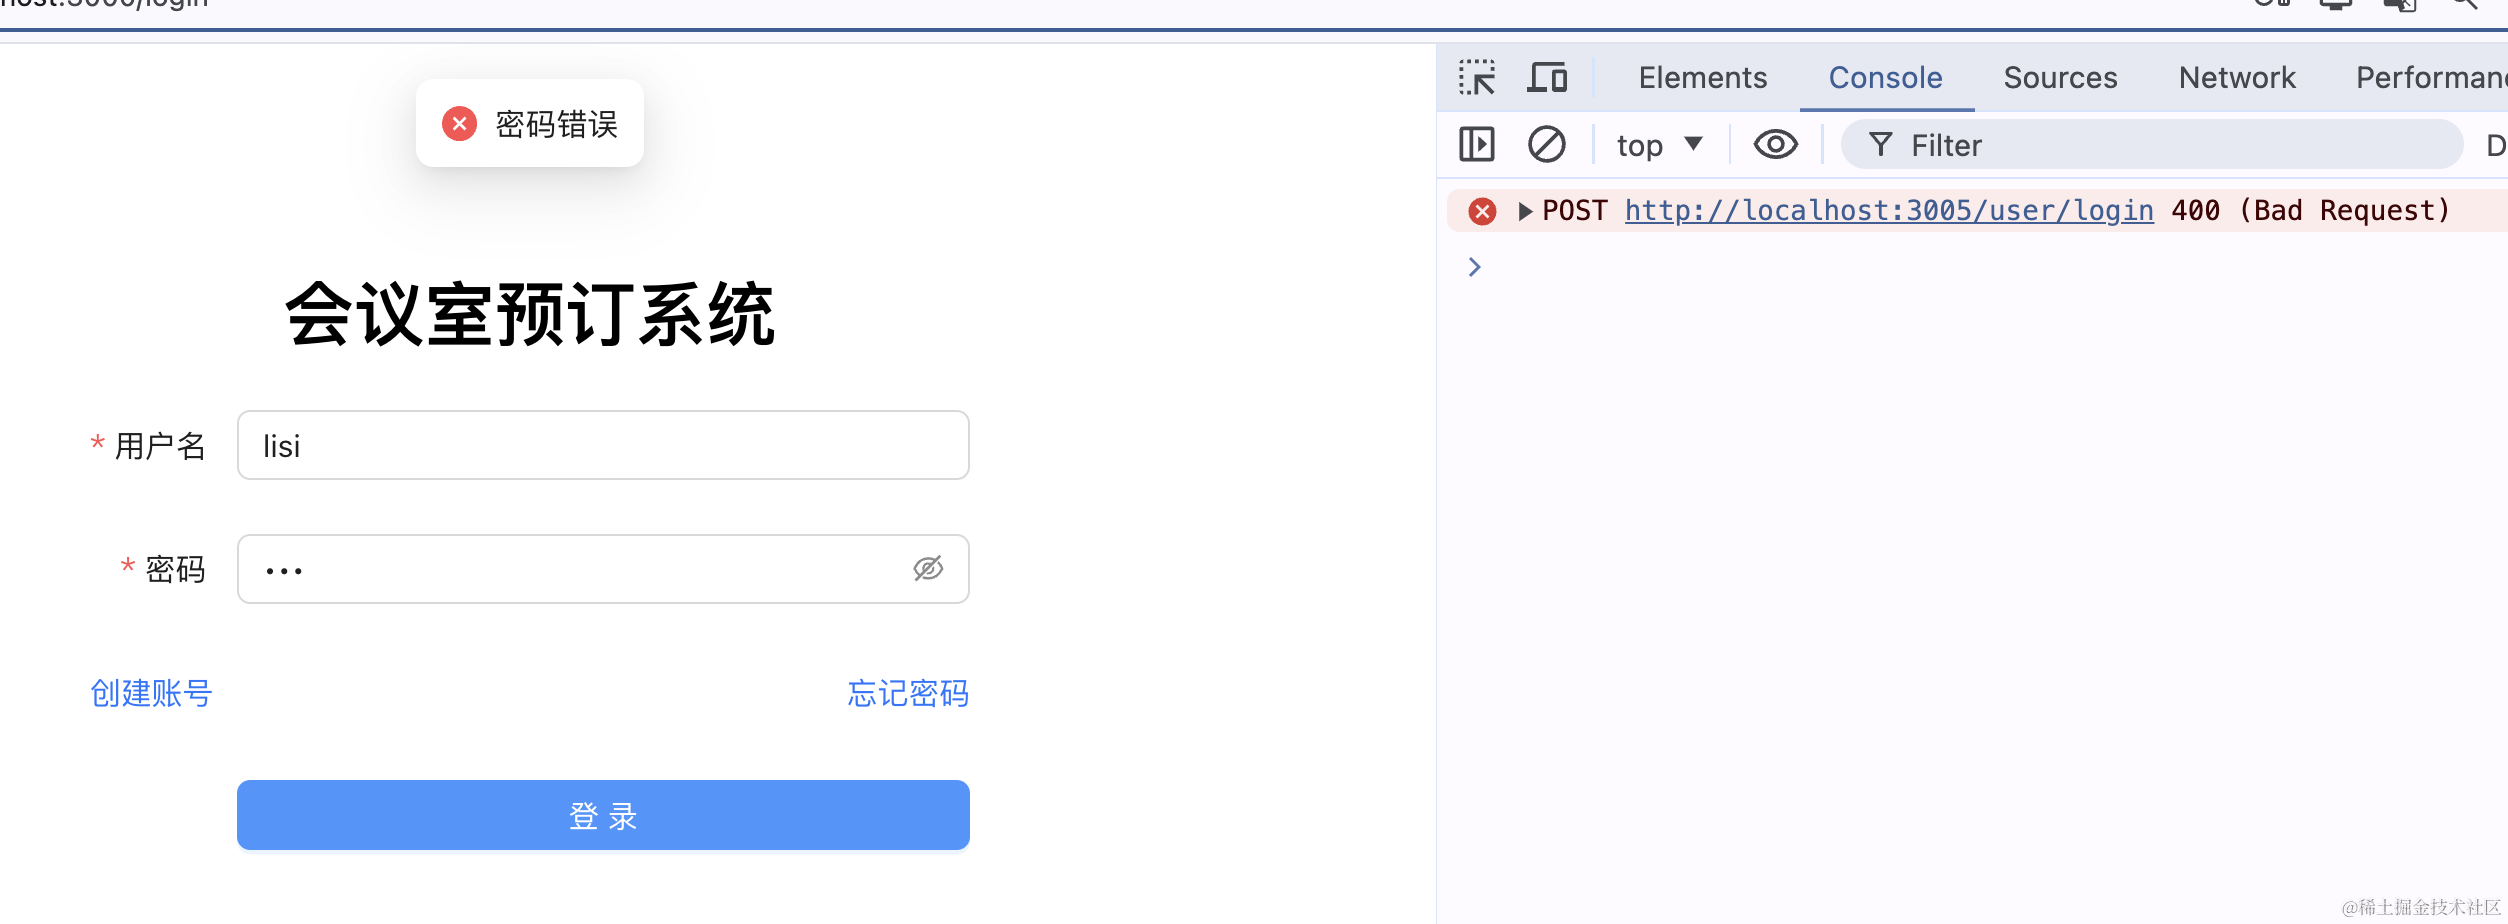
当密码错误:
用户名密码都正确时:
没啥问题。
这样,我们的 passport 就集成成功了。
当然,passport-local、passport-jwt 都不集成也可以,直接用 passport-google 和 passport-github 就行。
各个策略都是独立的,可以单独使用。
下面我们来实现 google 和 github 登录:
上节我们实现了 Github 登录,这节继续来实现下 Google 登录。
在 passport 的网站搜索:
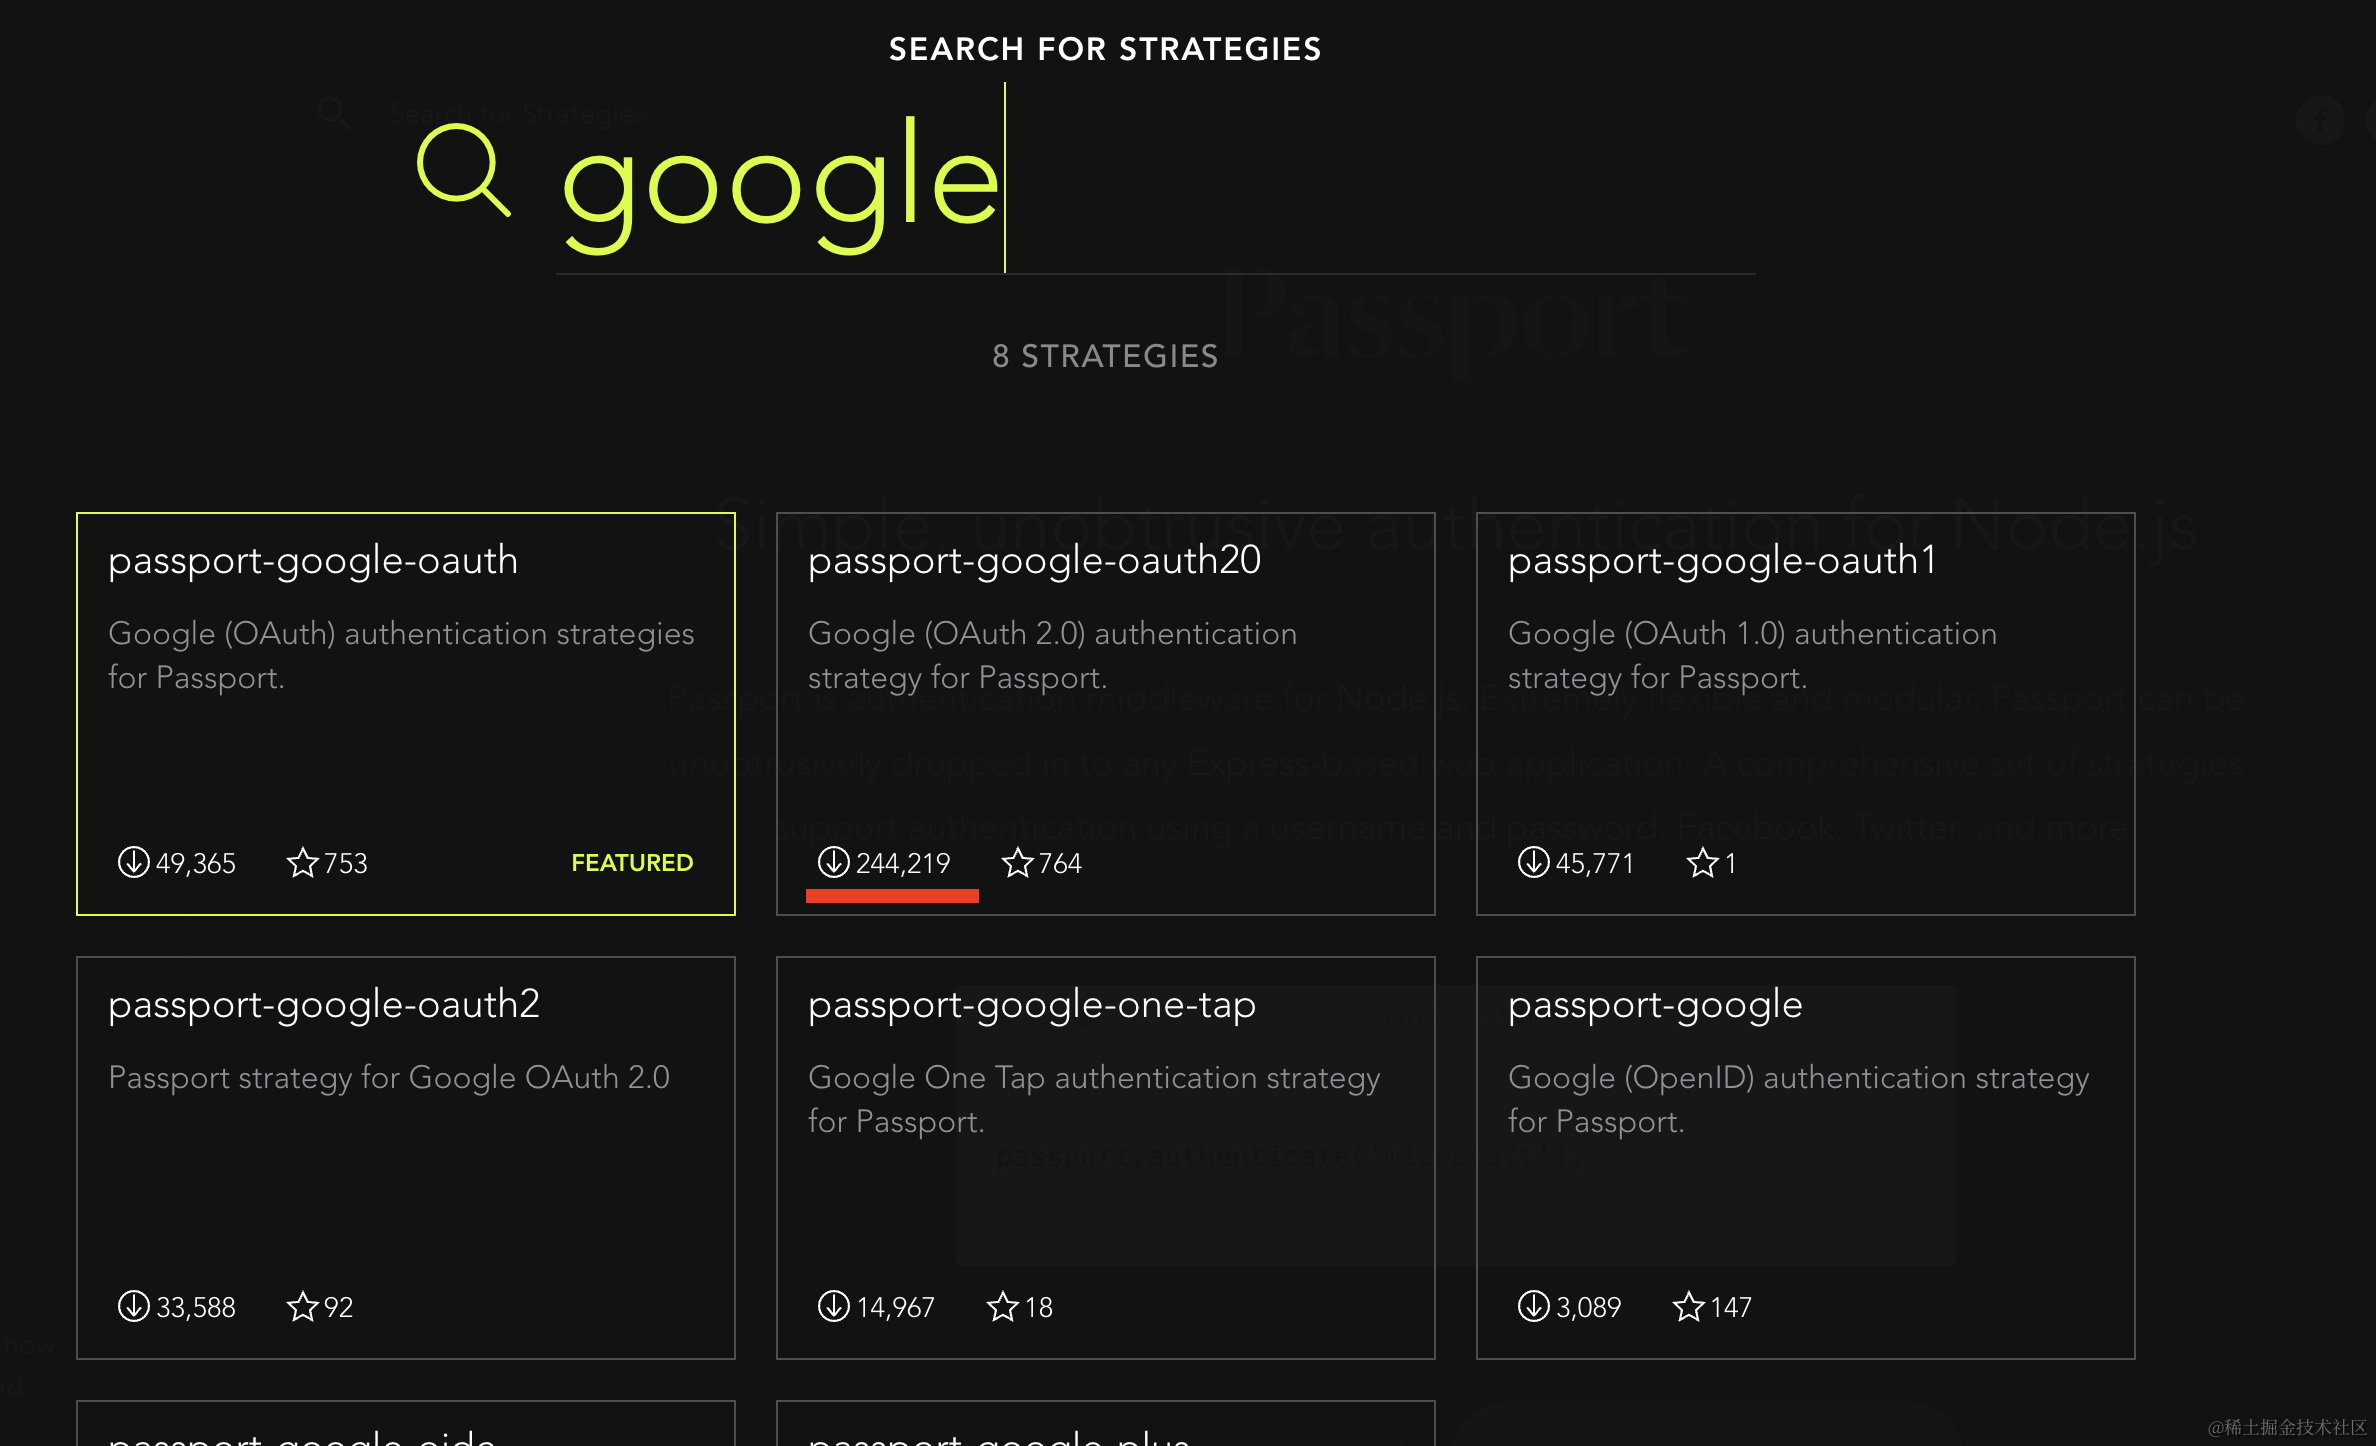
找下载量最多的那个。
然后安装下:
npm install --save passport-google-oauth20
npm install --save-dev @types/passport-google-oauth20
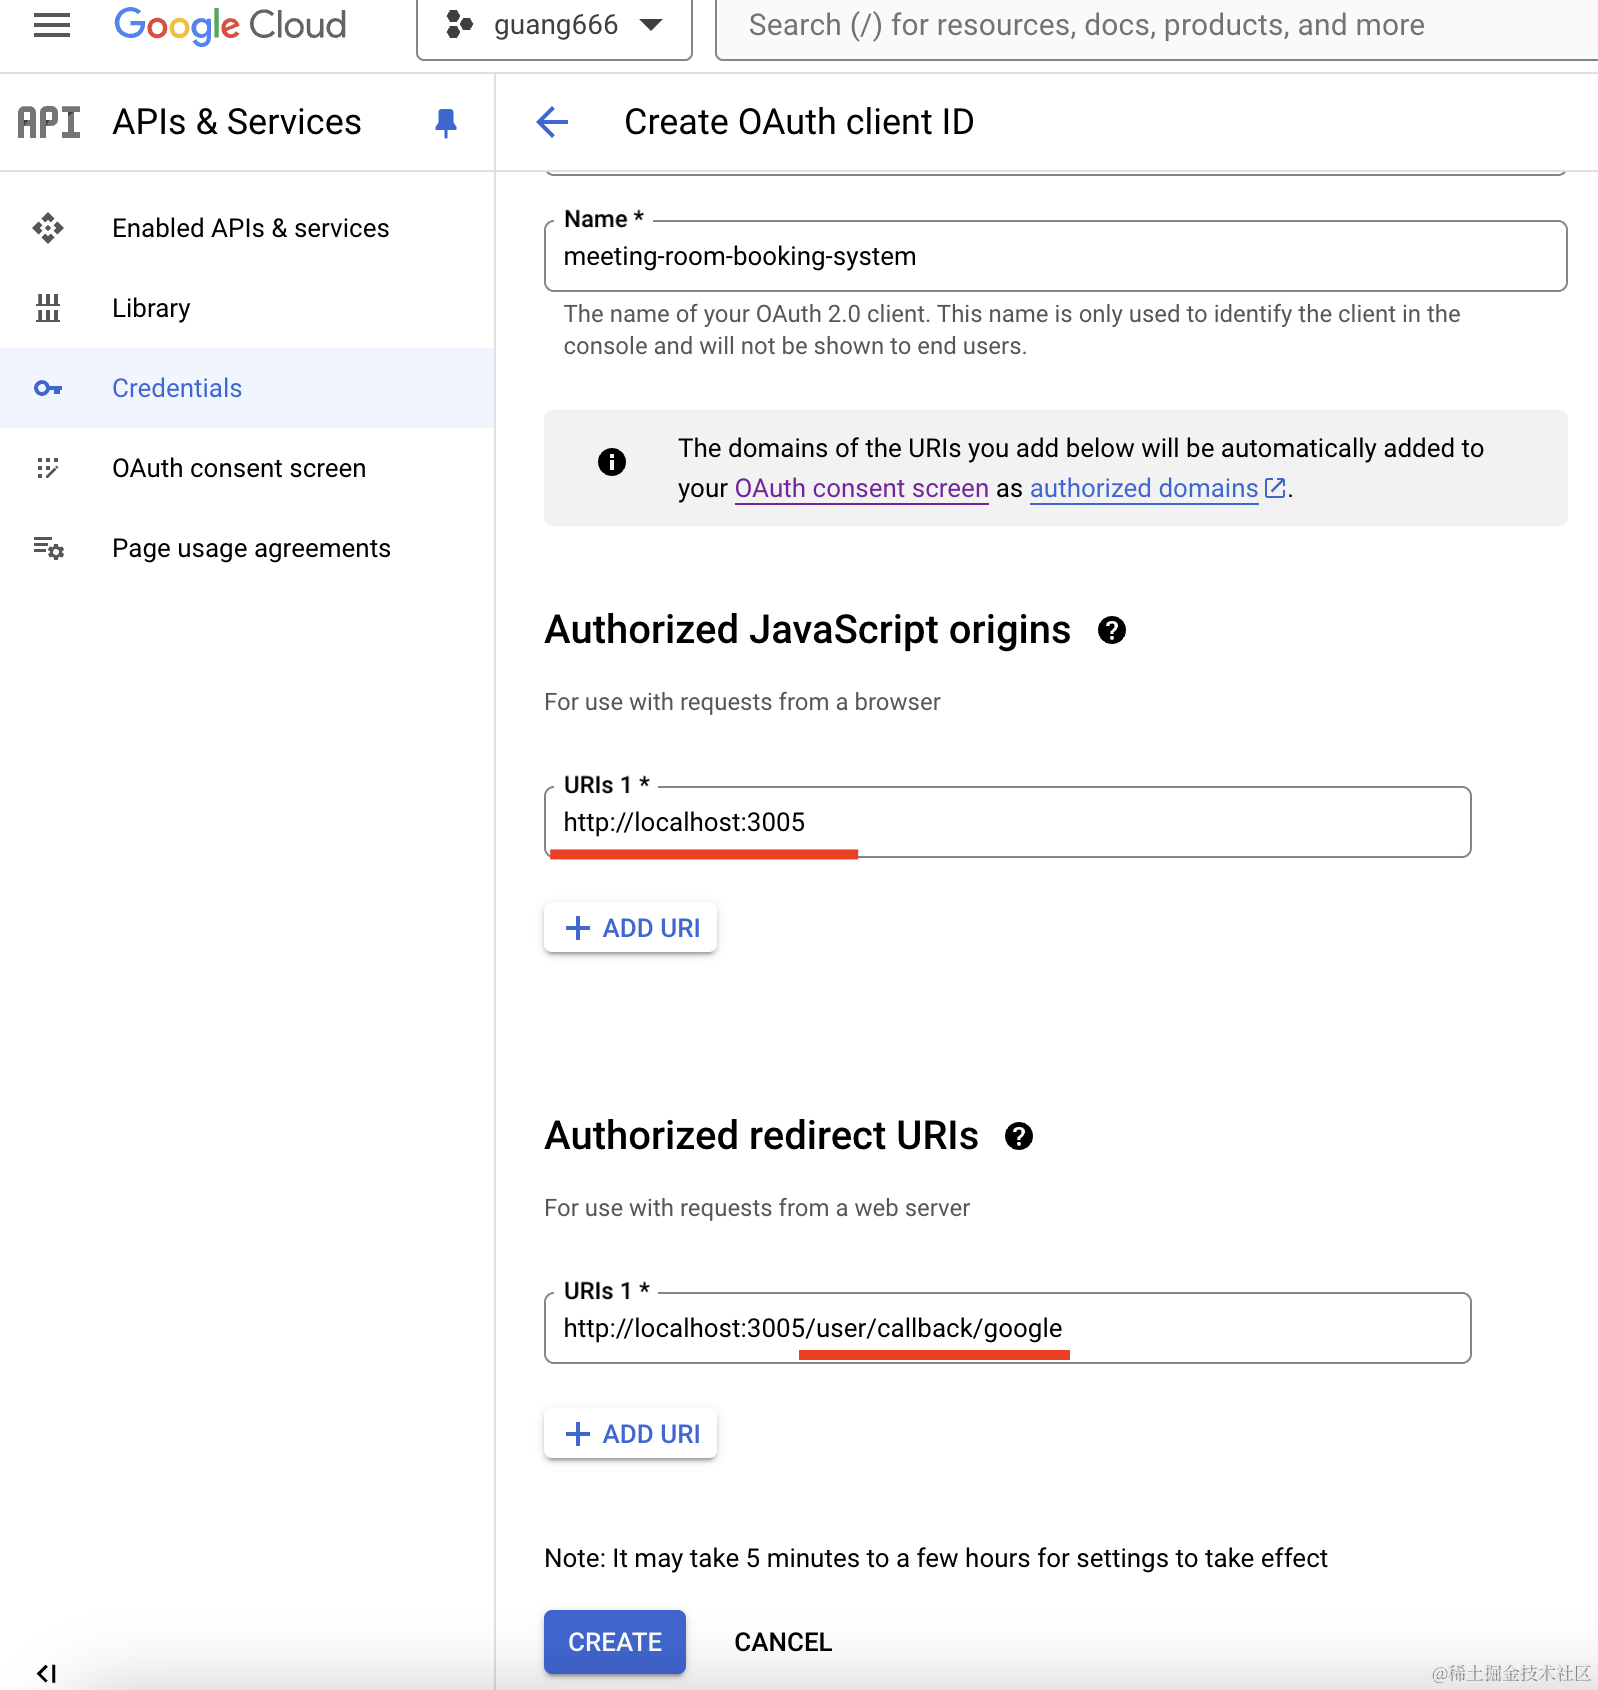
获取 client id 和 client secret 的步骤前面章节讲过。
授权的域名、callback url 要和应用中的对应才行,否则就重新搞一个。
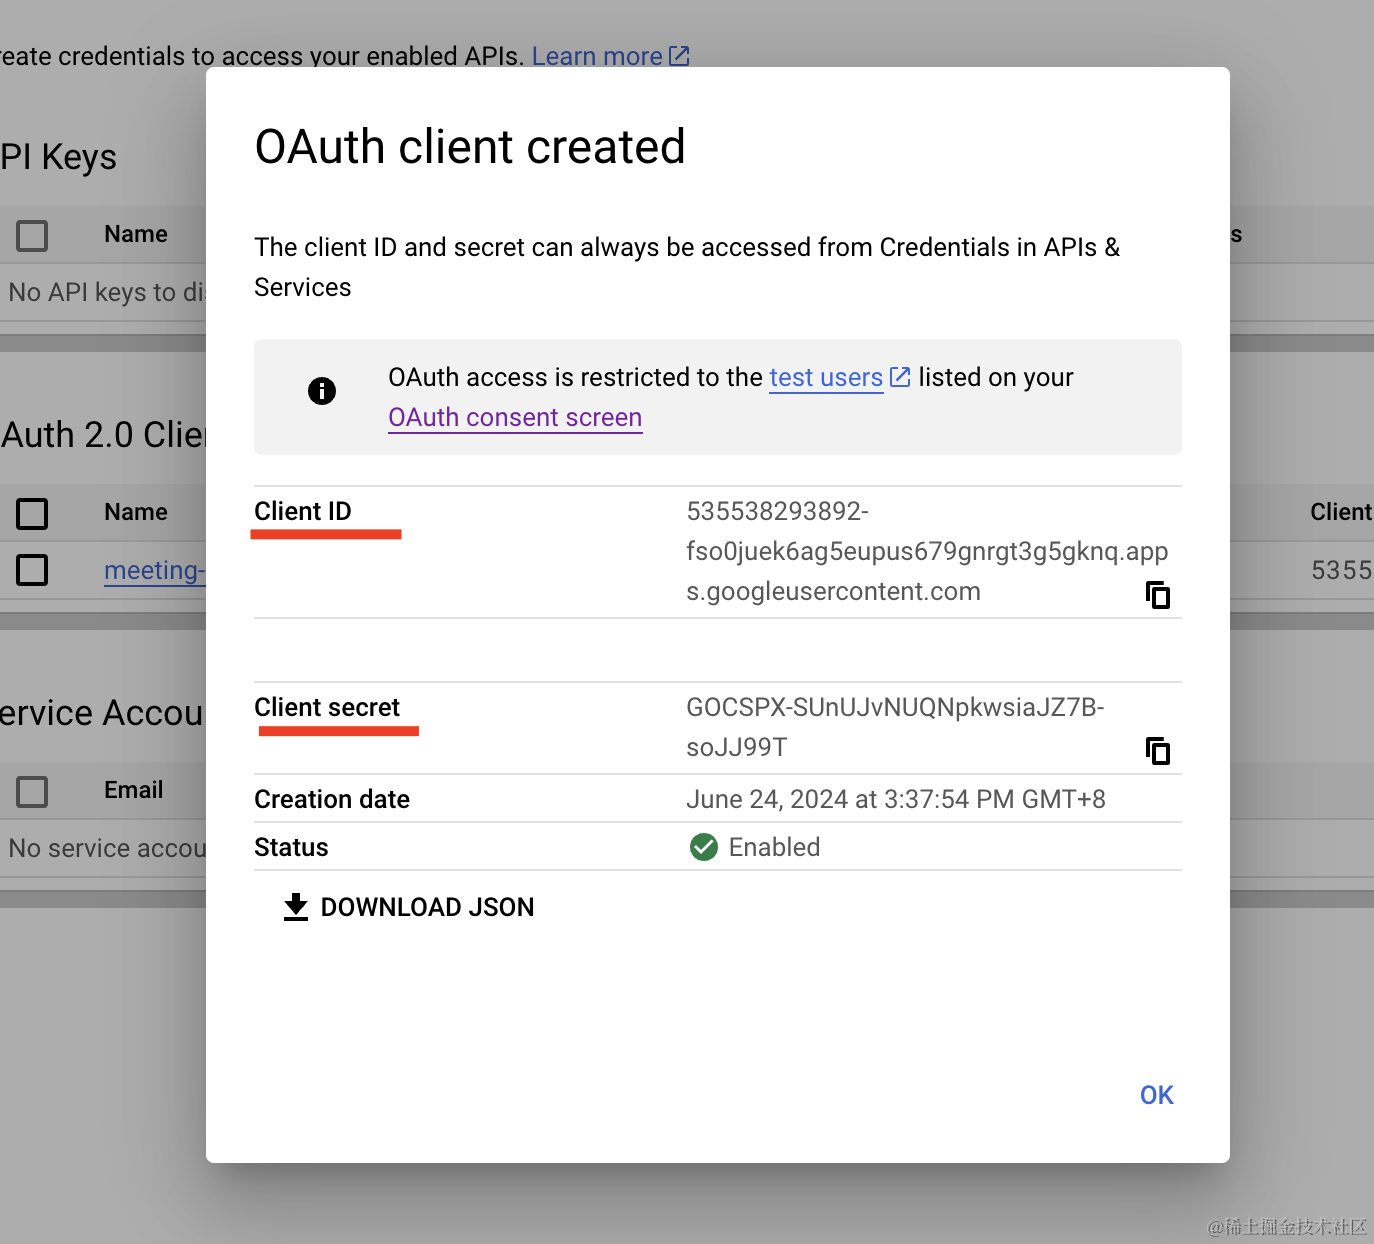
我这里重新注册了一个应用,拿到了 client id:
创建 auth/google.strategy.ts
import { Injectable } from "@nestjs/common";
import { PassportStrategy } from "@nestjs/passport";
import { Strategy } from "passport-google-oauth20";

@Injectable()
export class GoogleStrategy extends PassportStrategy(Strategy, "google") {
    constructor() {
        super({
            clientID:
                "535538293892-fso0juek6ag5eupus679gnrgt3g5gknq.apps.googleusercontent.com",
            clientSecret: "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",
            callbackURL: "http://localhost:3005/user/callback/google",
            scope: ["email", "profile"],
        });
    }

    validate(accessToken: string, refreshToken: string, profile: any) {
        const { name, emails, photos } = profile;
        const user = {
            email: emails[0].value,
            firstName: name.givenName,
            lastName: name.familyName,
            picture: photos[0].value,
            accessToken,
        };
        return user;
    }
}
这里填入刚刚的 clientID、clientSecret、callbackURL。
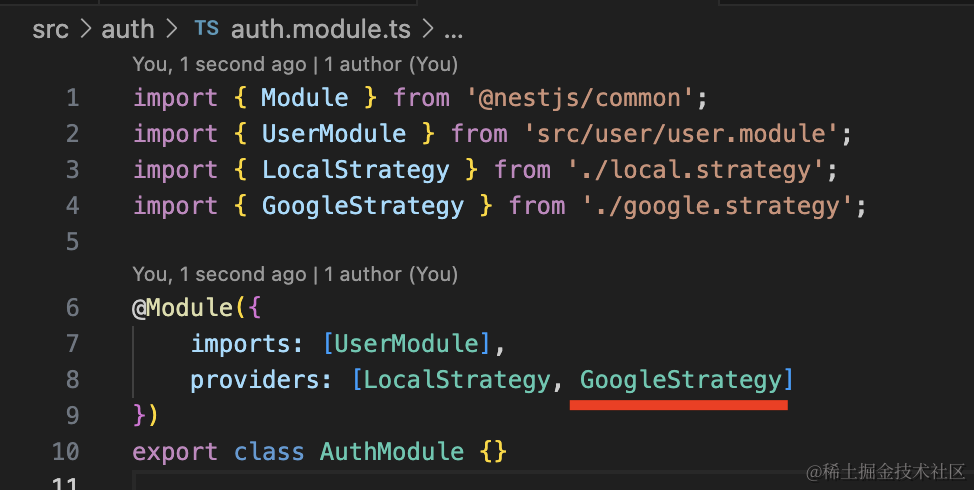
在 AuthModule 引入:
之后在 UserController 添加两个路由:
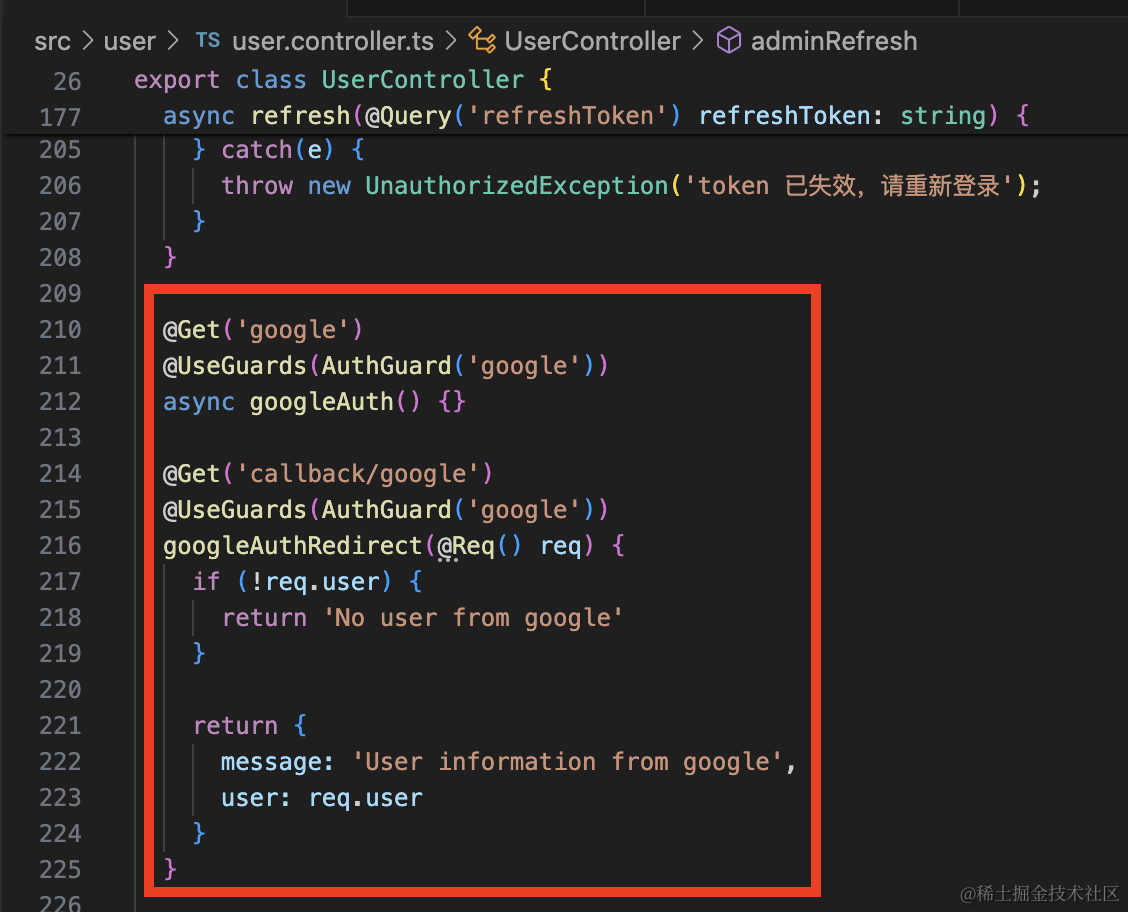
@Get('google')
@UseGuards(AuthGuard('google'))
async googleAuth() {}

@Get('callback/google')
@UseGuards(AuthGuard('google'))
googleAuthRedirect(@Req() req) {
    if (!req.user) {
      return 'No user from google'
    }

    return {
      message: 'User information from google',
      user: req.user
    }
}
一个是触发登录的,一个是回调的。
测试下:
可以看到,google 的用户信息拿到了:
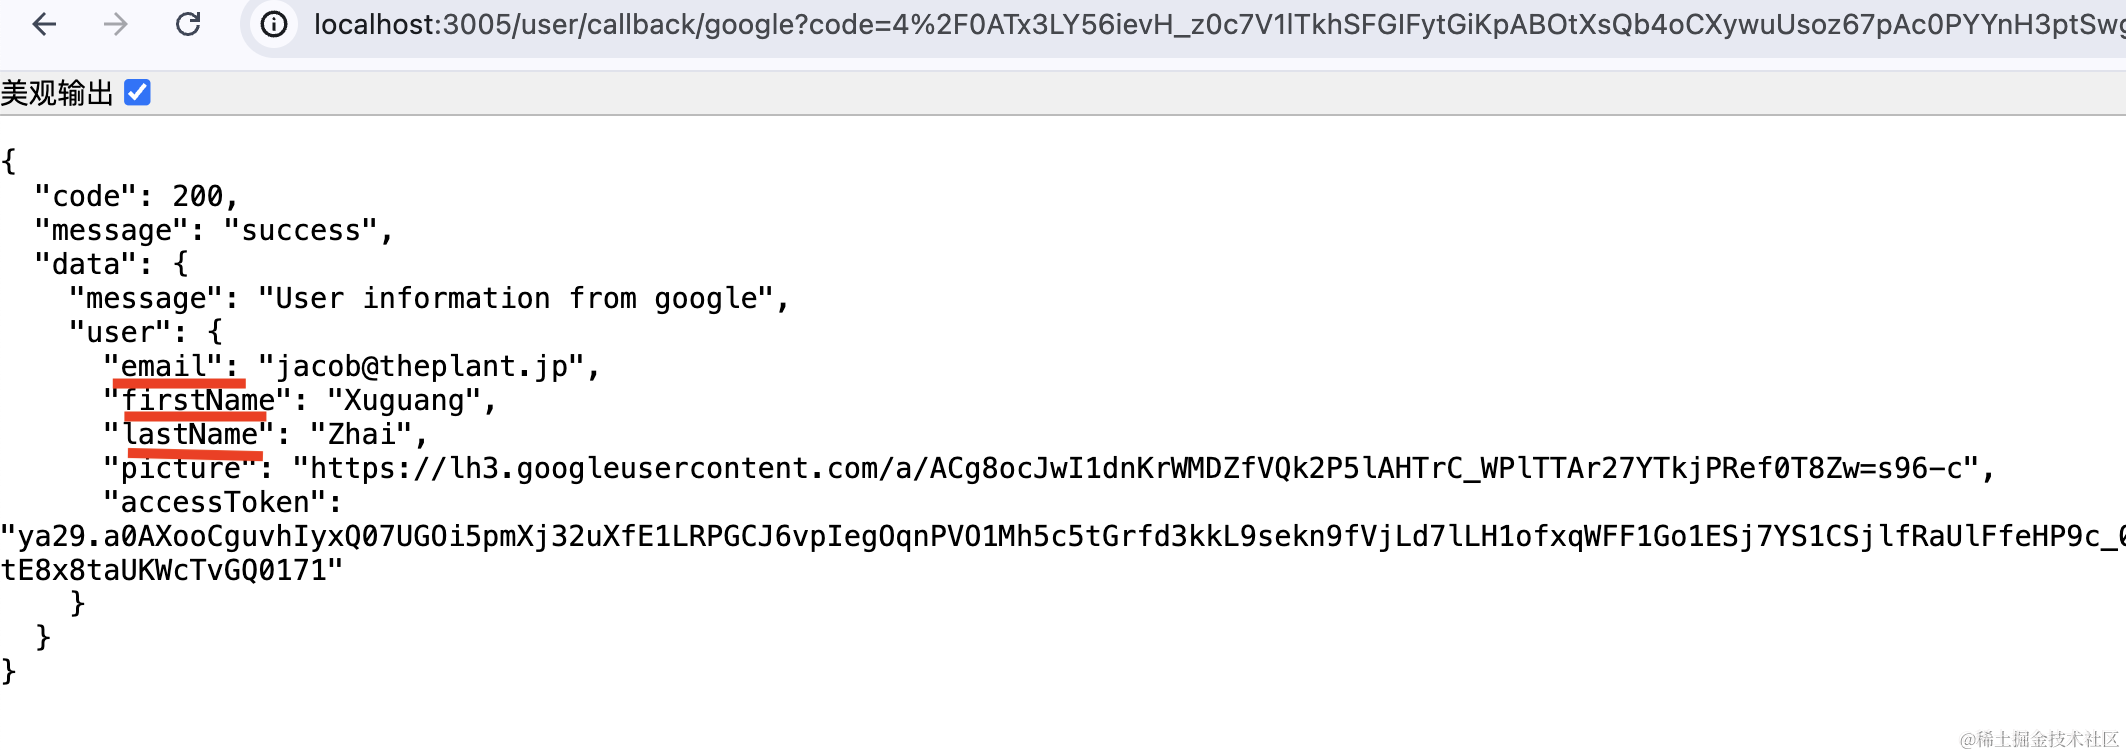
那我们只要在拿到用户信息的时候自动注册下就好了。
在 user.entity.ts 添加 loginType 字段:

@Column({
    type: 'int',
    comment: '登录类型, 0 用户名密码登录, 1 Google 登录, 2 Github 登录',
    default: 0
})
loginType: LoginType;
export enum LoginType {
    USERNAME_PASSWORD = 0,
    GOOGLE = 1,
    GITHUB = 2,
}
默认是用户名密码登录,值是 0,当 google 或者 github 登录时,loginType 是 1 和 2。
因为前几节我们把 synchronize 关掉了,所以现在并不会自动创建这一列:

我们通过 migration:generate 生成个迁移:
npm run migration:generate src/migrations/add-user-loginType-column
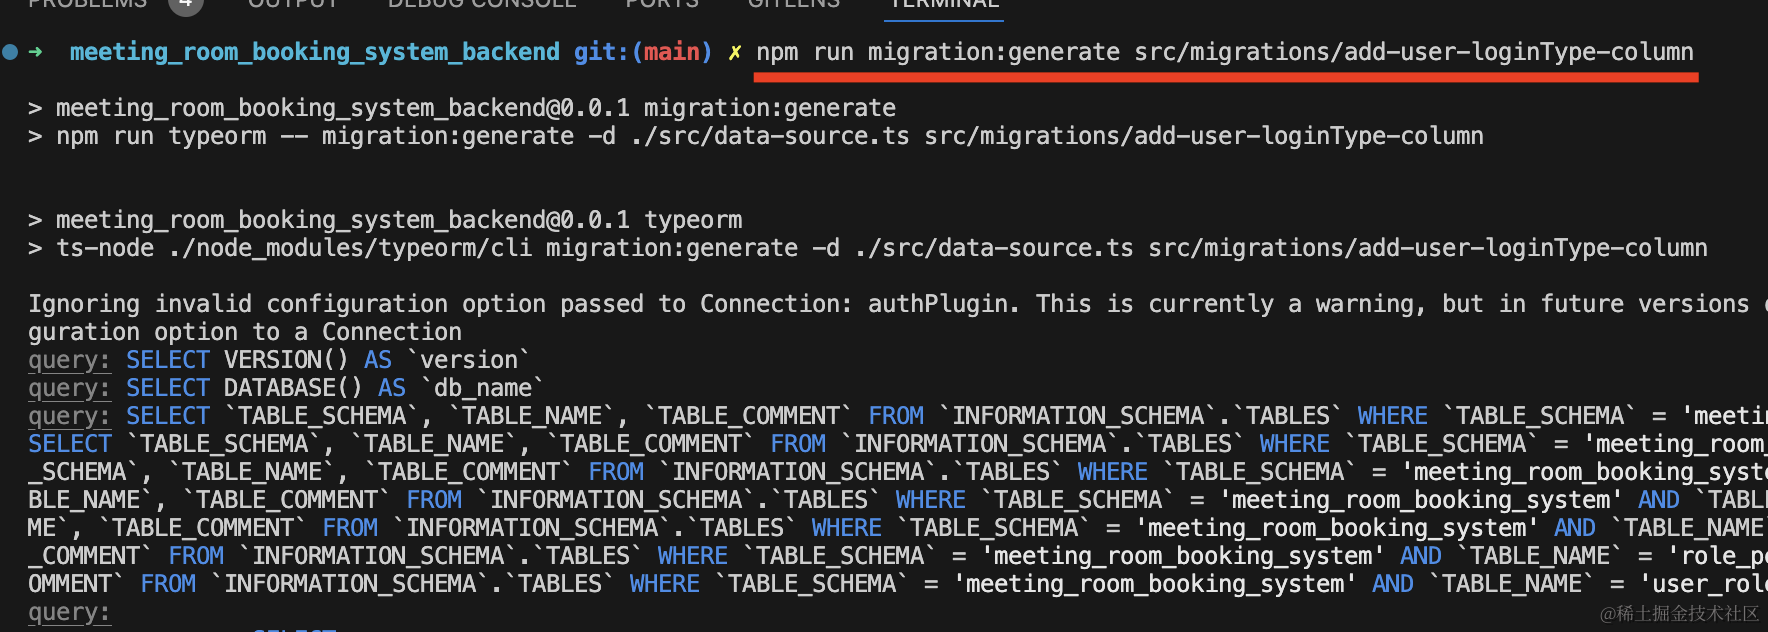
生成的迁移类没问题:

跑一下:
npm run migration:run
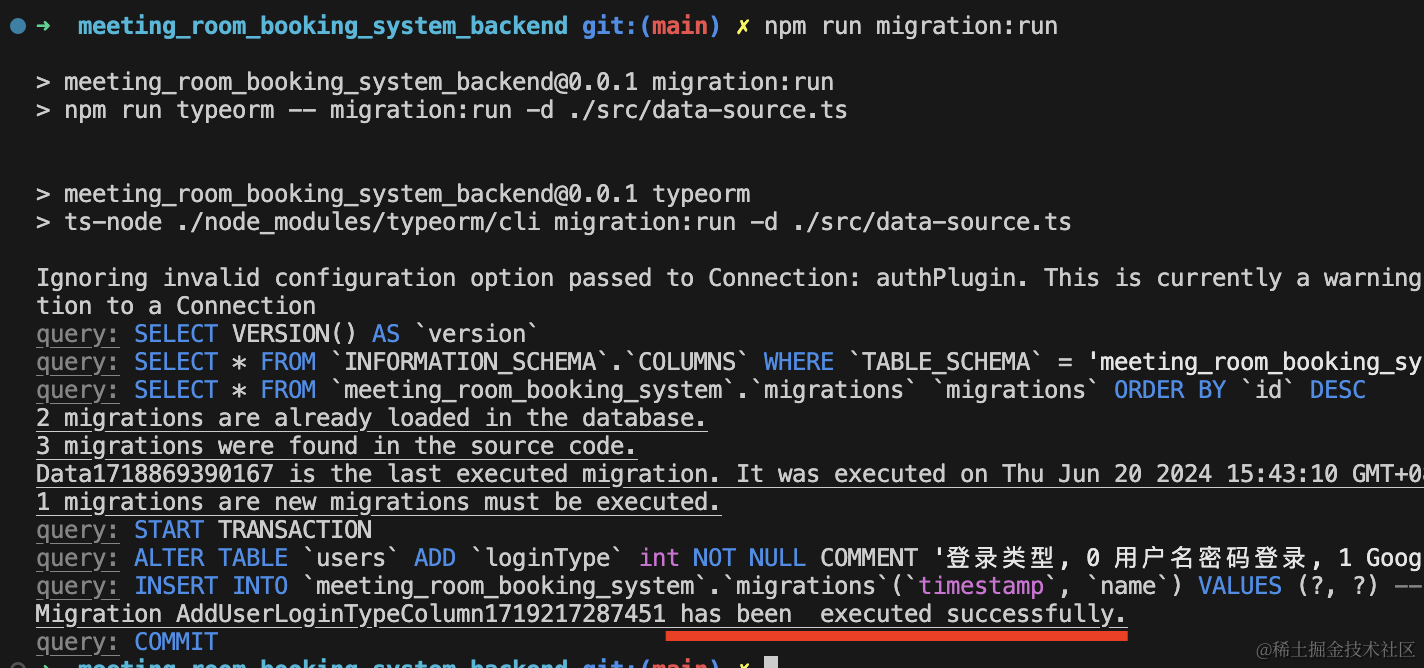
在数据库看一下:
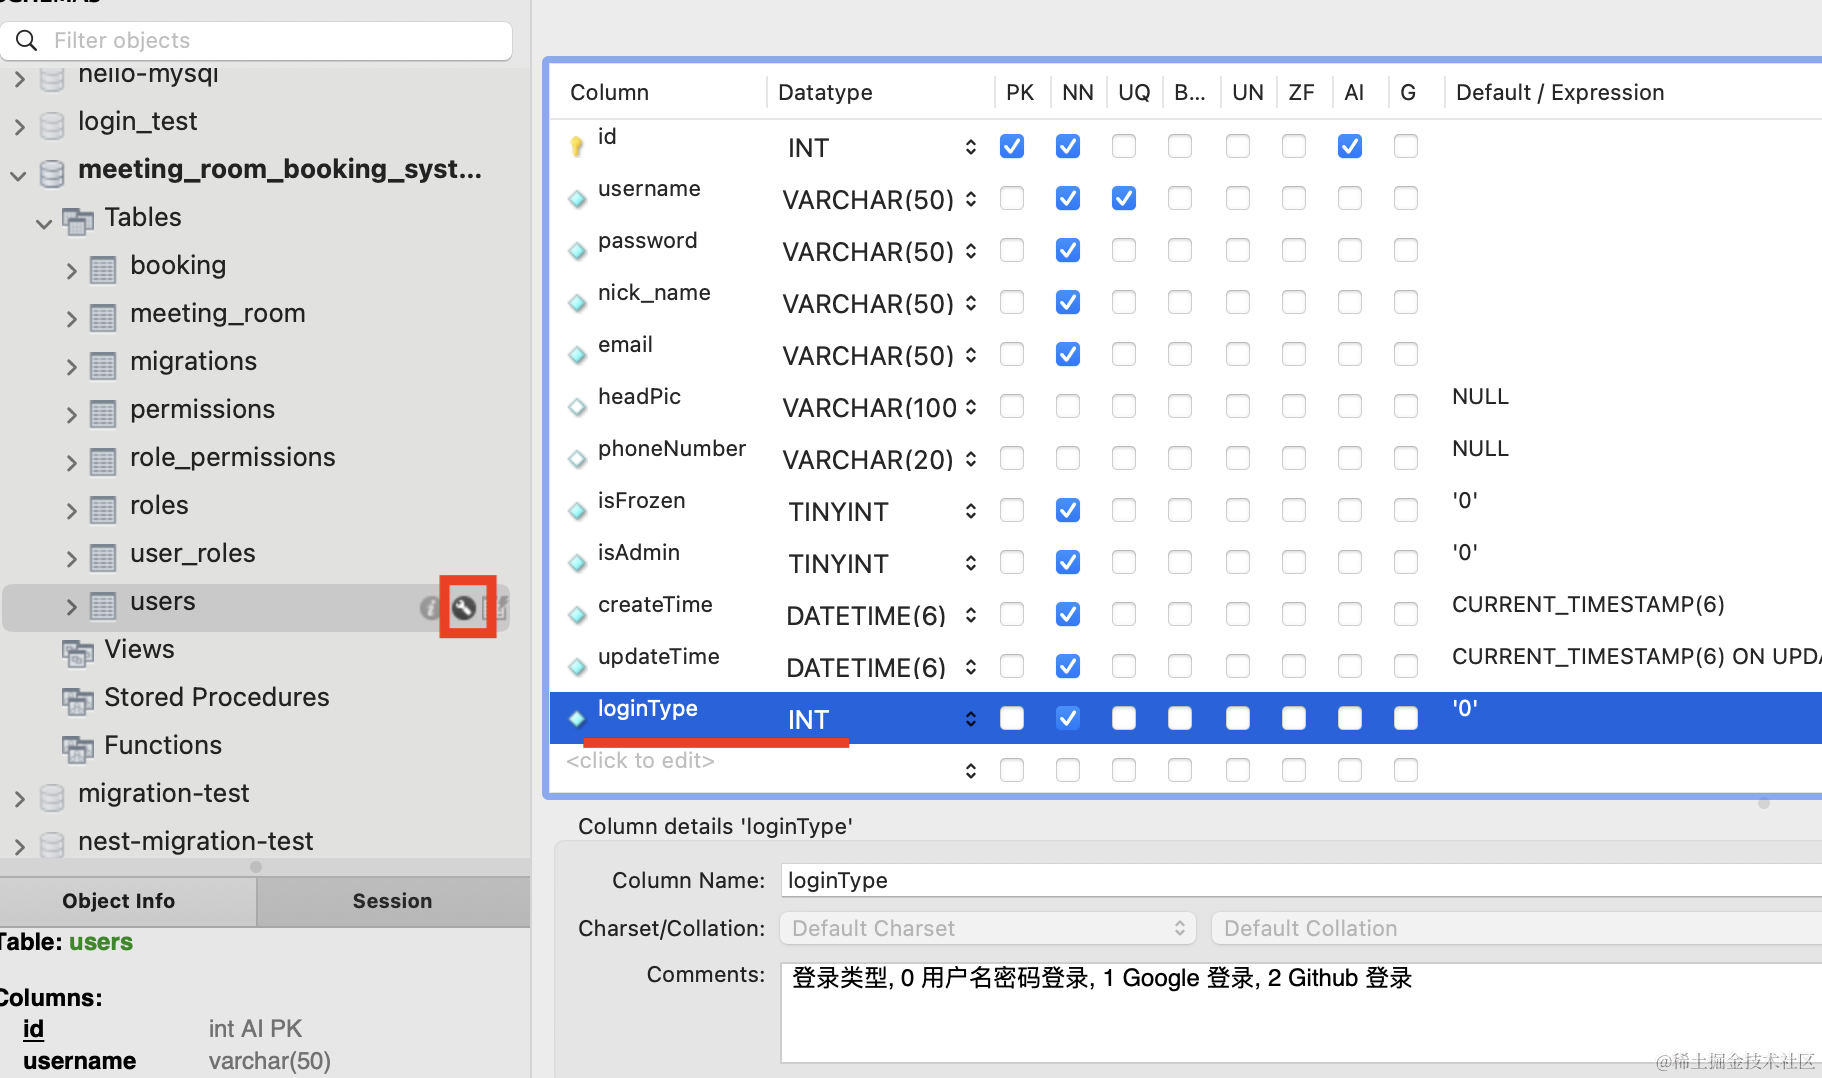

loginType 列添加成功了。
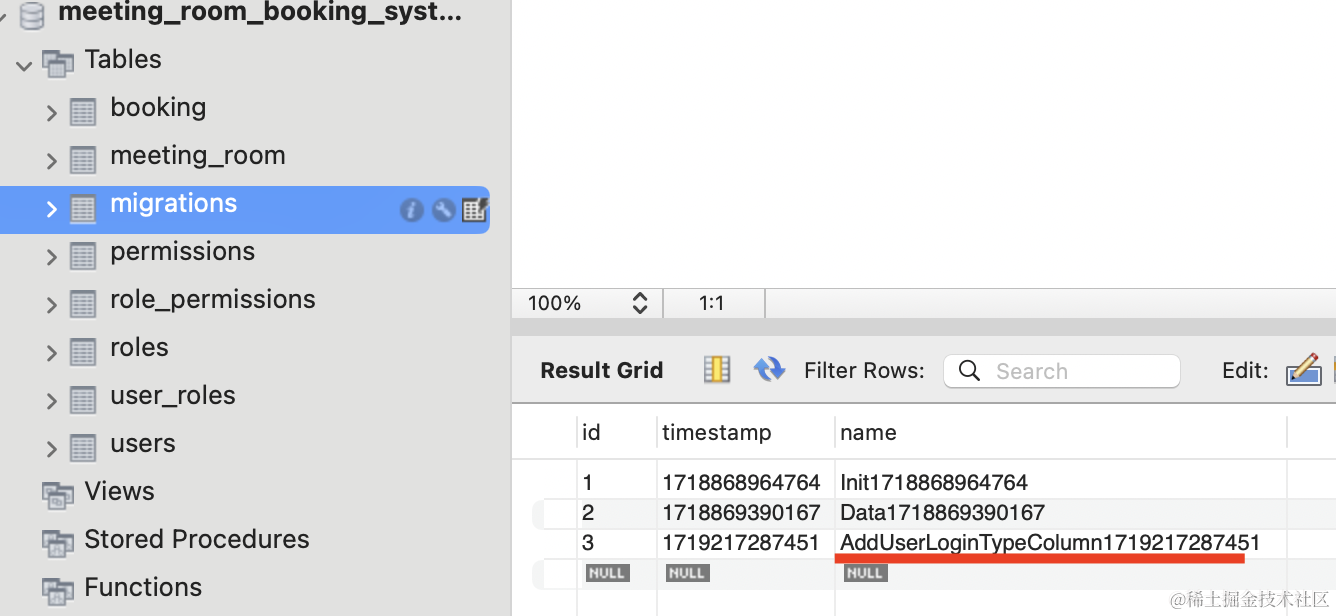
migrations 表也记录了这条执行记录。
然后补充下 google 授权后自动注册的逻辑:
在 UserService 里添加 registerByGoogleInfo 方法:
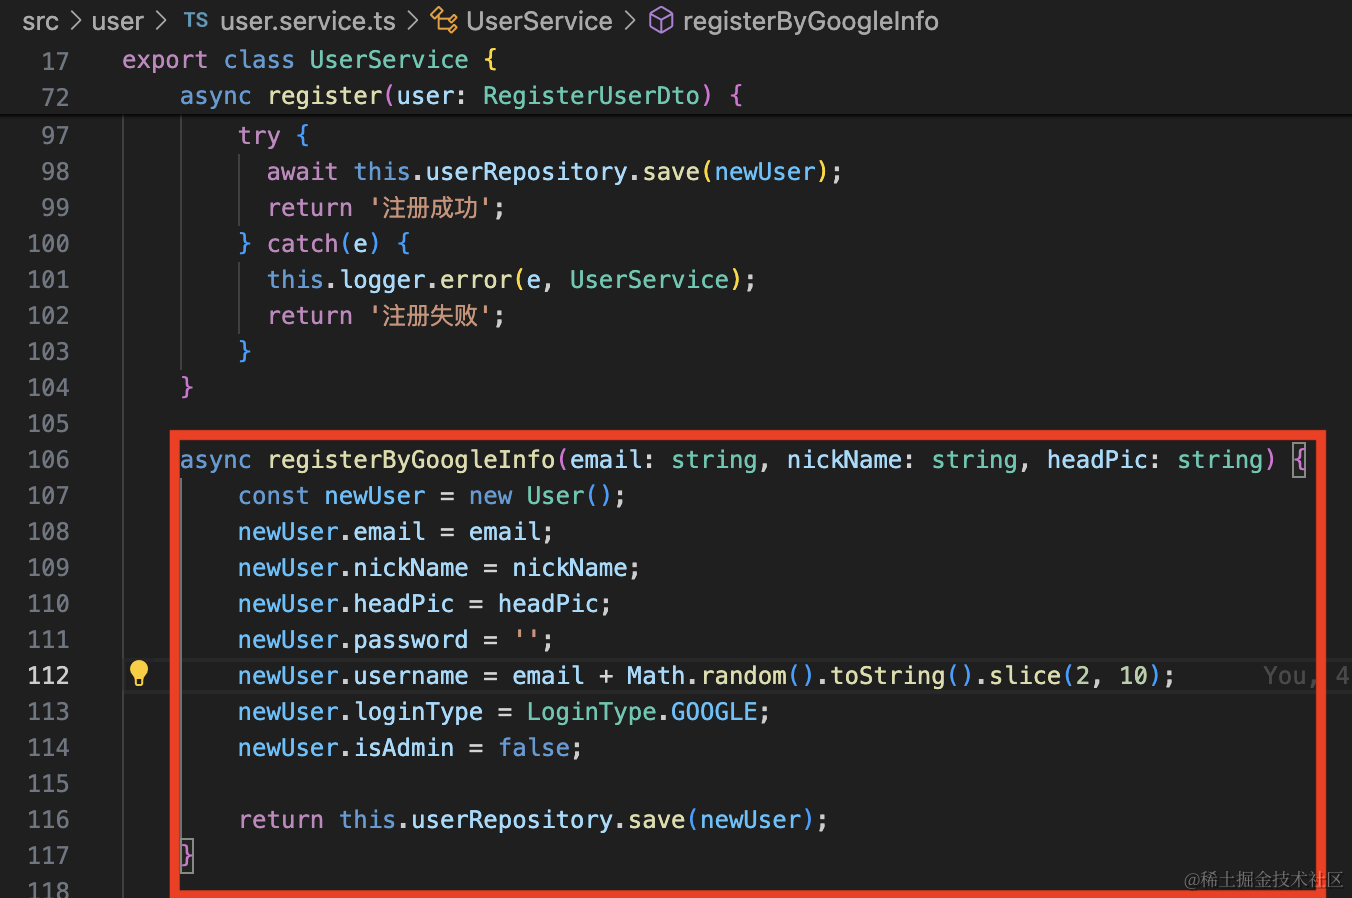
async registerByGoogleInfo(email: string, nickName: string, headPic: string) {
    const newUser = new User();
    newUser.email = email;
    newUser.nickName = nickName;
    newUser.headPic = headPic;
    newUser.password = '';
    newUser.username = email + Math.random().toString().slice(2, 10);
    newUser.loginType = LoginType.GOOGLE;
    newUser.isAdmin = false;

    return this.userRepository.save(newUser);
}
email、nickName、headPic 都是基于 google 返回的信息。

username 我们就用 email + 随机数的方式生成,反正也不需要用用户名密码登录,保证唯一就行。
passport 也是一样。
在 UserController 调用下:
@Get('callback/google')
@UseGuards(AuthGuard('google'))
async googleAuthRedirect(@Req() req) {
  if (!req.user) {
    throw new BadRequestException('google 登录失败');
  }
  const user = await this.userService.registerByGoogleInfo(
    req.user.email,
    req.user.firstName + ' ' + req.user.lastName,
    req.user.picture
  );

  const vo = new LoginUserVo();
  vo.userInfo = {
      id: user.id,
      username: user.username,
      nickName: user.nickName,
      email: user.email,
      phoneNumber: user.phoneNumber,
      headPic: user.headPic,
      createTime: user.createTime.getTime(),
      isFrozen: user.isFrozen,
      isAdmin: user.isAdmin,
      roles: [],
      permissions: []
  }

  vo.accessToken = this.jwtService.sign({
    userId: vo.userInfo.id,
    username: vo.userInfo.username,
    email: vo.userInfo.email,
    roles: vo.userInfo.roles,
    permissions: vo.userInfo.permissions
  }, {
    expiresIn: this.configService.get('jwt_access_token_expires_time') || '30m'
  });

  vo.refreshToken = this.jwtService.sign({
    userId: vo.userInfo.id
  }, {
    expiresIn: this.configService.get('jwt_refresh_token_expres_time') || '7d'
  });

  return vo;
}
就是用 google 返回的信息来自动注册,并且自动登录,返回 accessToken 和 refreshToken。
测试下:
可以看到,google 授权之后,自动注册并返回了 token 信息,这样带上这个访问就是登录状态了:

数据库里 user 表也插入了该用户的记录:

nickName、headPic、username、loginType 都是对的。
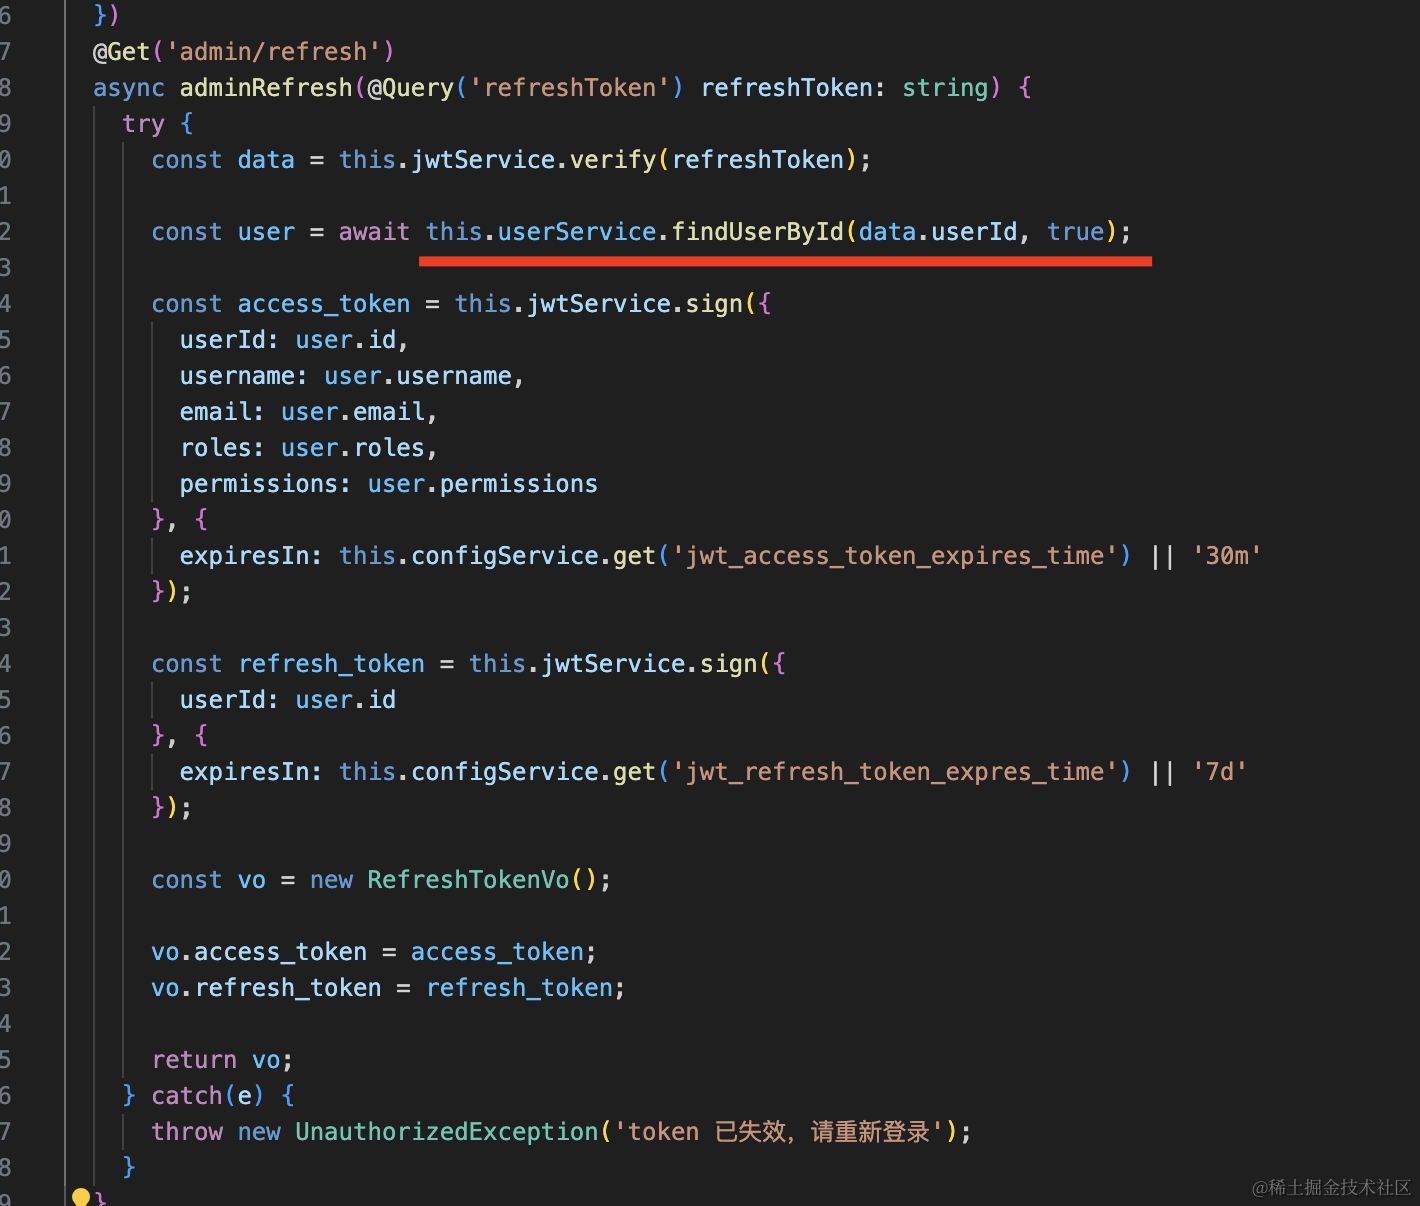
后续 refreshToken 的流程不受影响,因为它只是取出 jwt 里的 userId 来查询用户信息并重新生成 token 返回:
然后继续处理 google 登录:
google 第一次账号授权会自动注册并登录,但是后续就不需要注册了。
所以我们要加个判断:
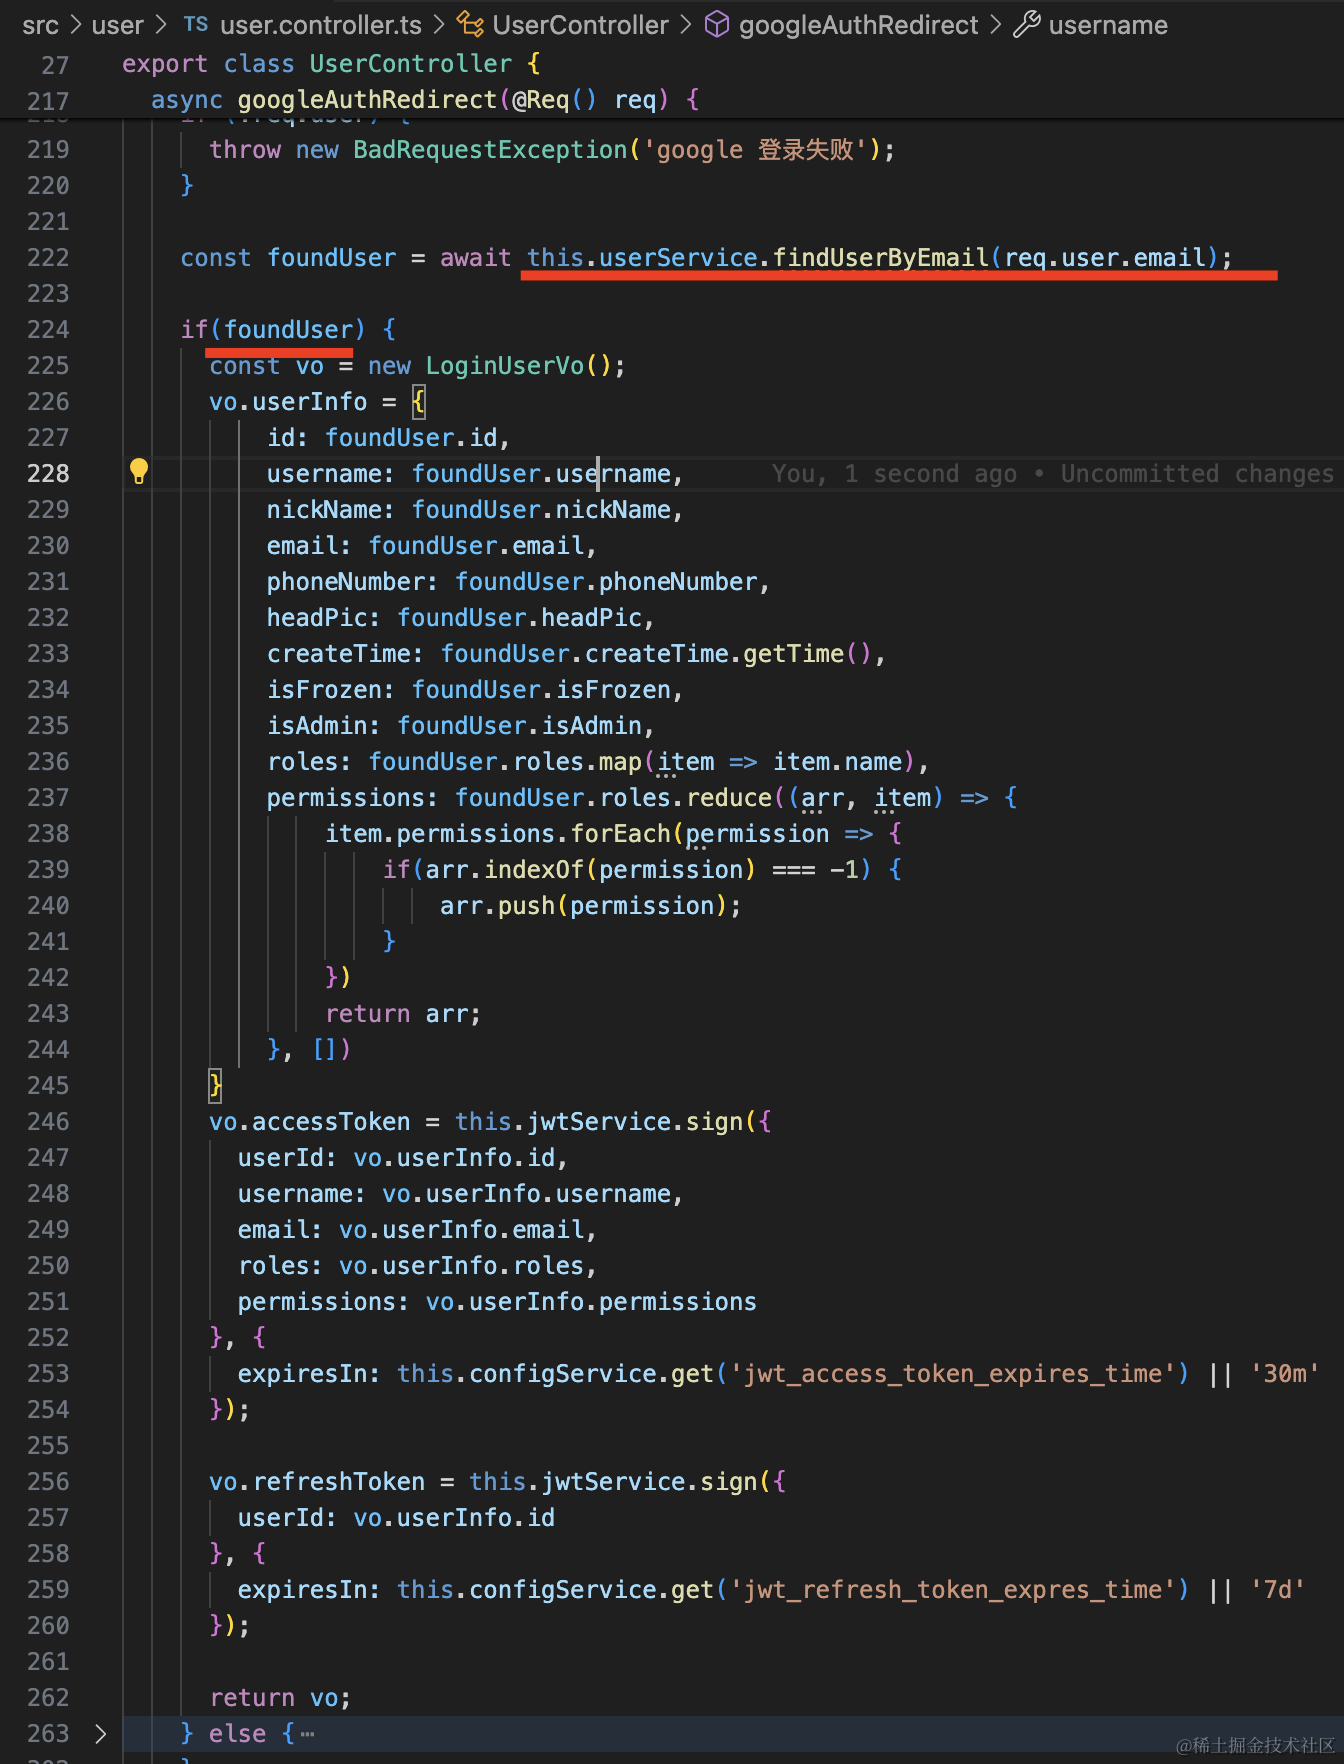
如果 email 能查到用户,那就直接登录:
@Get('callback/google')
@UseGuards(AuthGuard('google'))
async googleAuthRedirect(@Req() req) {
  if (!req.user) {
    throw new BadRequestException('google 登录失败');
  }

  const foundUser = await this.userService.findUserByEmail(req.user.email);

  if(foundUser) {
    const vo = new LoginUserVo();
    vo.userInfo = {
        id: foundUser.id,
        username: foundUser.username,
        nickName: foundUser.nickName,
        email: foundUser.email,
        phoneNumber: foundUser.phoneNumber,
        headPic: foundUser.headPic,
        createTime: foundUser.createTime.getTime(),
        isFrozen: foundUser.isFrozen,
        isAdmin: foundUser.isAdmin,
        roles: foundUser.roles.map(item => item.name),
        permissions: foundUser.roles.reduce((arr, item) => {
            item.permissions.forEach(permission => {
                if(arr.indexOf(permission) === -1) {
                    arr.push(permission);
                }
            })
            return arr;
        }, [])
    }
    vo.accessToken = this.jwtService.sign({
      userId: vo.userInfo.id,
      username: vo.userInfo.username,
      email: vo.userInfo.email,
      roles: vo.userInfo.roles,
      permissions: vo.userInfo.permissions
    }, {
      expiresIn: this.configService.get('jwt_access_token_expires_time') || '30m'
    });

    vo.refreshToken = this.jwtService.sign({
      userId: vo.userInfo.id
    }, {
      expiresIn: this.configService.get('jwt_refresh_token_expres_time') || '7d'
    });

    return vo;
  } else {
    const user = await this.userService.registerByGoogleInfo(
      req.user.email,
      req.user.firstName + ' ' + req.user.lastName,
      req.user.picture
    );

    const vo = new LoginUserVo();
    vo.userInfo = {
        id: user.id,
        username: user.username,
        nickName: user.nickName,
        email: user.email,
        phoneNumber: user.phoneNumber,
        headPic: user.headPic,
        createTime: user.createTime.getTime(),
        isFrozen: user.isFrozen,
        isAdmin: user.isAdmin,
        roles: [],
        permissions: []
    }

    vo.accessToken = this.jwtService.sign({
      userId: vo.userInfo.id,
      username: vo.userInfo.username,
      email: vo.userInfo.email,
      roles: vo.userInfo.roles,
      permissions: vo.userInfo.permissions
    }, {
      expiresIn: this.configService.get('jwt_access_token_expires_time') || '30m'
    });

    vo.refreshToken = this.jwtService.sign({
      userId: vo.userInfo.id
    }, {
      expiresIn: this.configService.get('jwt_refresh_token_expres_time') || '7d'
    });

    return vo;
  }
}
在 UserService 实现 findUserByEmail 方法:
async findUserByEmail(email: string) {
    const user =  await this.userRepository.findOne({
        where: {
            email: email,
            isAdmin: false,
        },
        relations: [ 'roles', 'roles.permissions']
    });

    return user;
}
测试下:
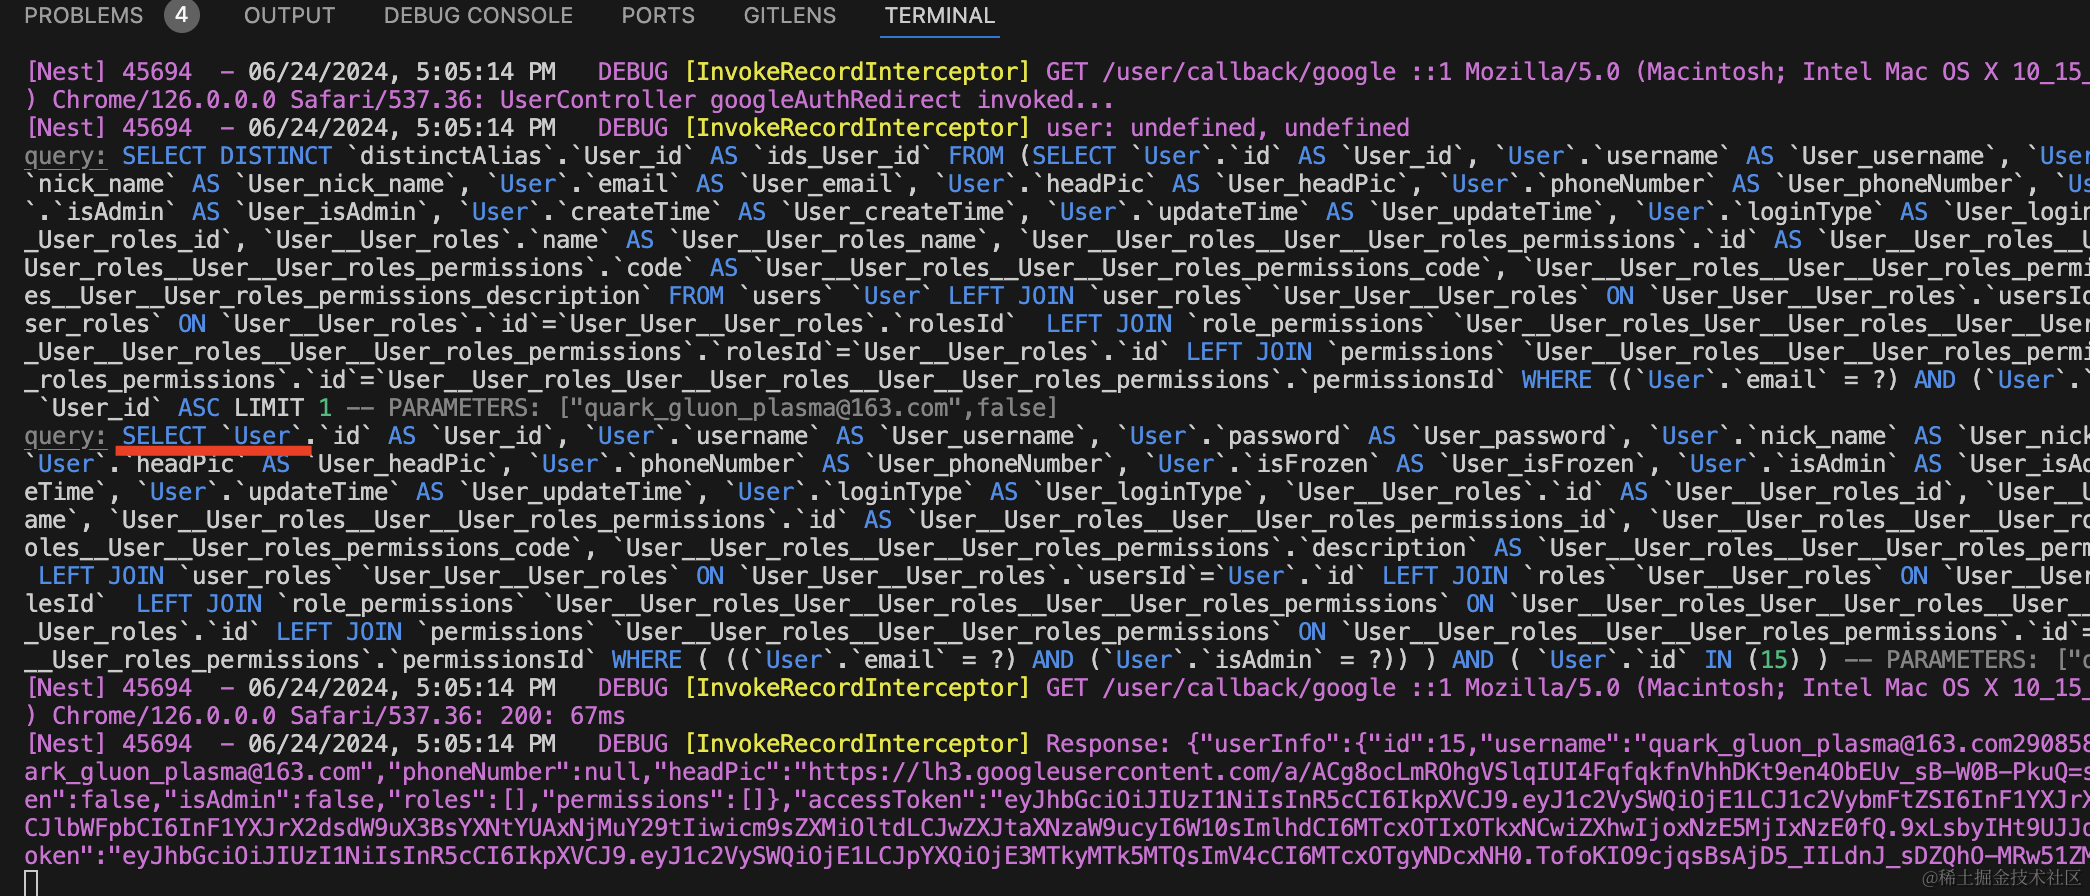
数据库已经注册了这个 google 账号对应的 user,再次授权,会查询注册的用户信息返回。
可以看到,只执行了 select 语句:
但网站登录后一般都会重定向到首页:
这时候一般都是用 cookie 返回 token 的,比如 https://hub.docker.com 就是这么做的:
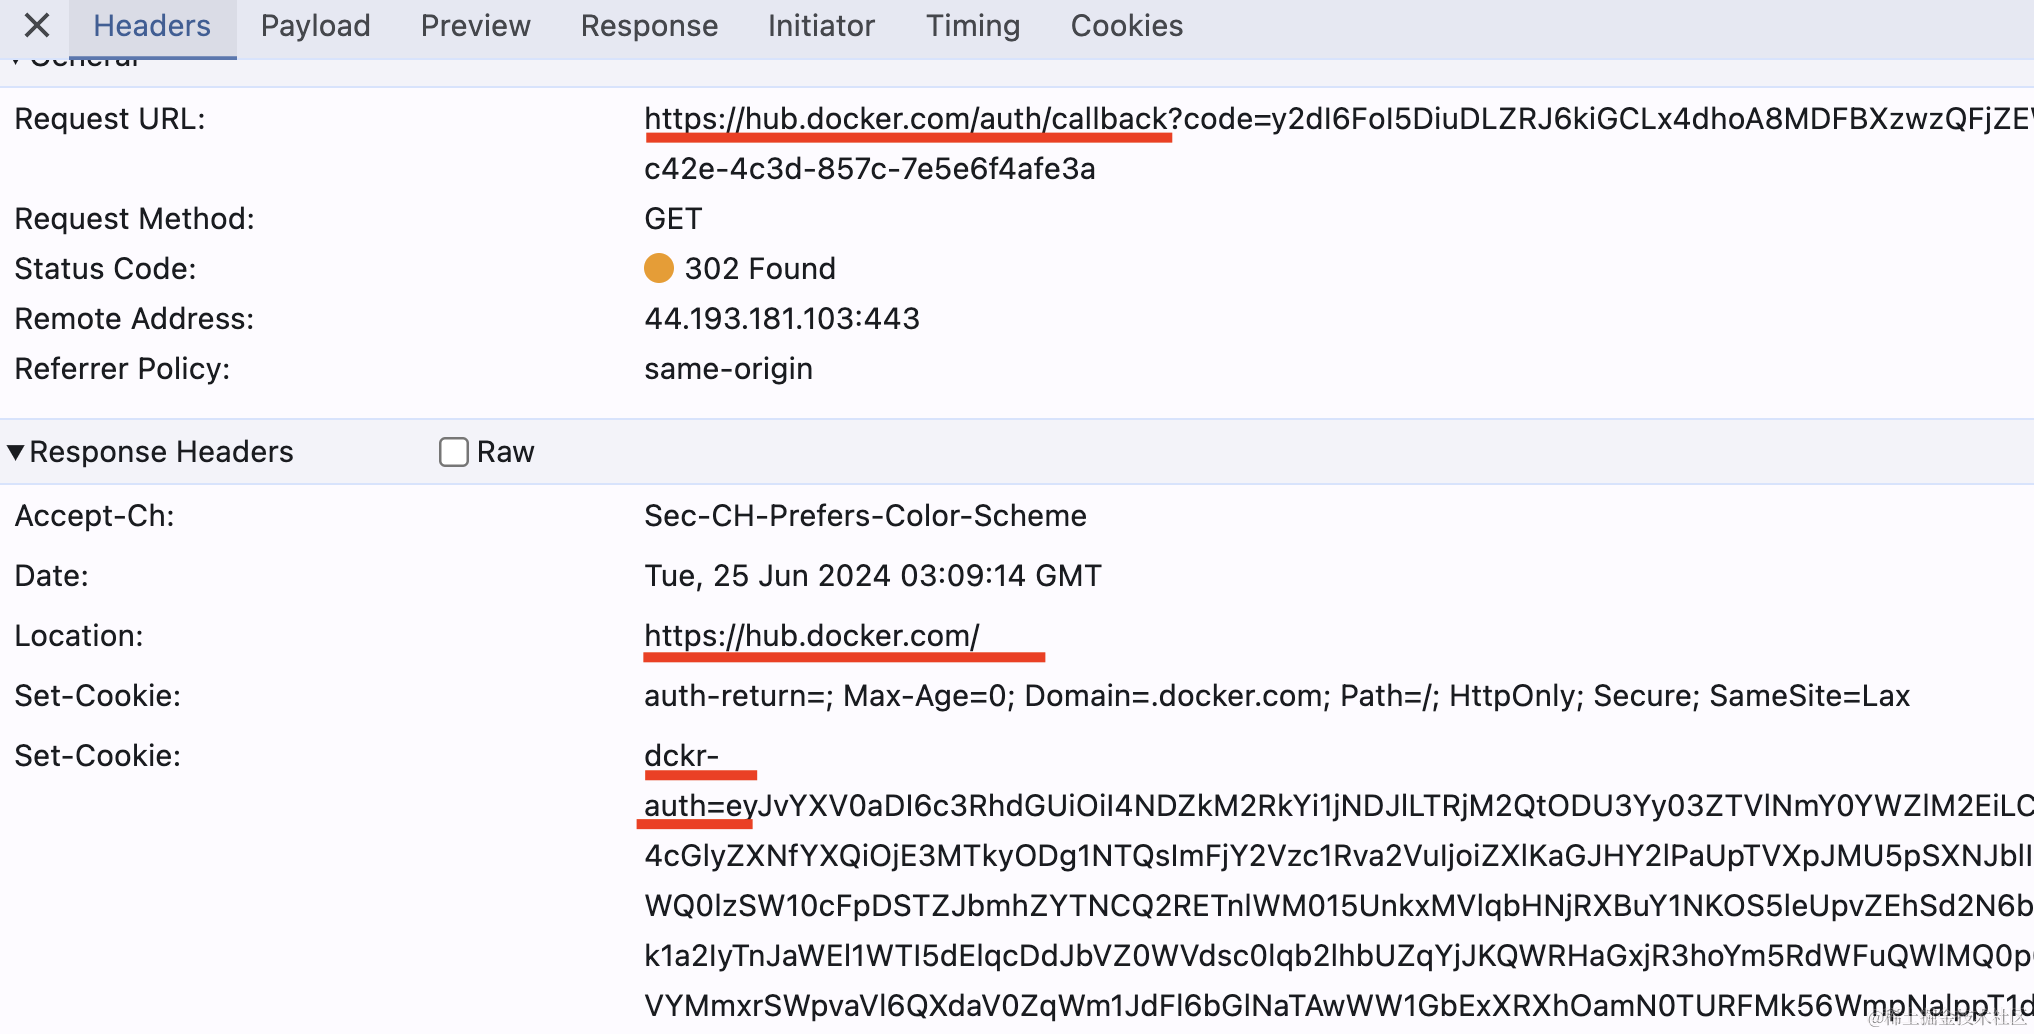
可以看到,它并不是直接返回 jwt 的 token,而是重定向回首页,在 cookie 里携带 token。
前端只要判断下如果 cookie 里有这些 token 就自动登录就好了。
我们也处理下:
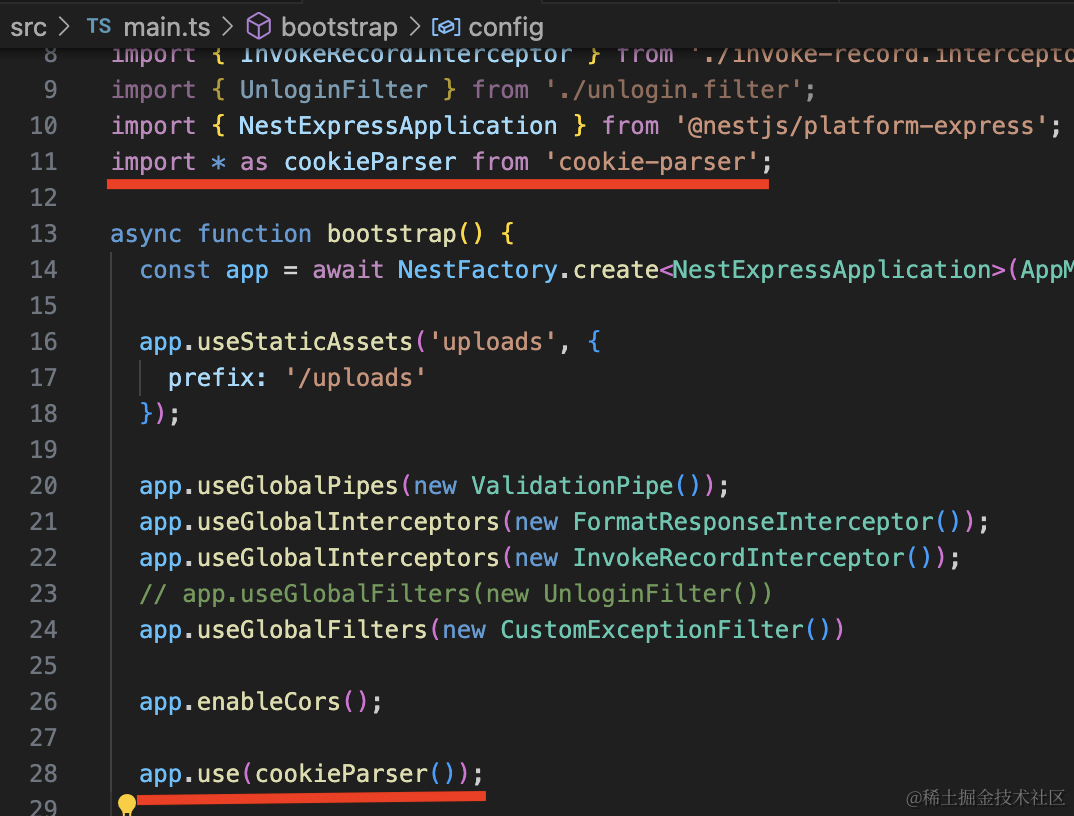
操作 cookie 需要用到 cookie-parser 中间件:
npm install --save cookie-parser

npm install --save-dev @types/cookie-parser
在 main.ts 启用下:
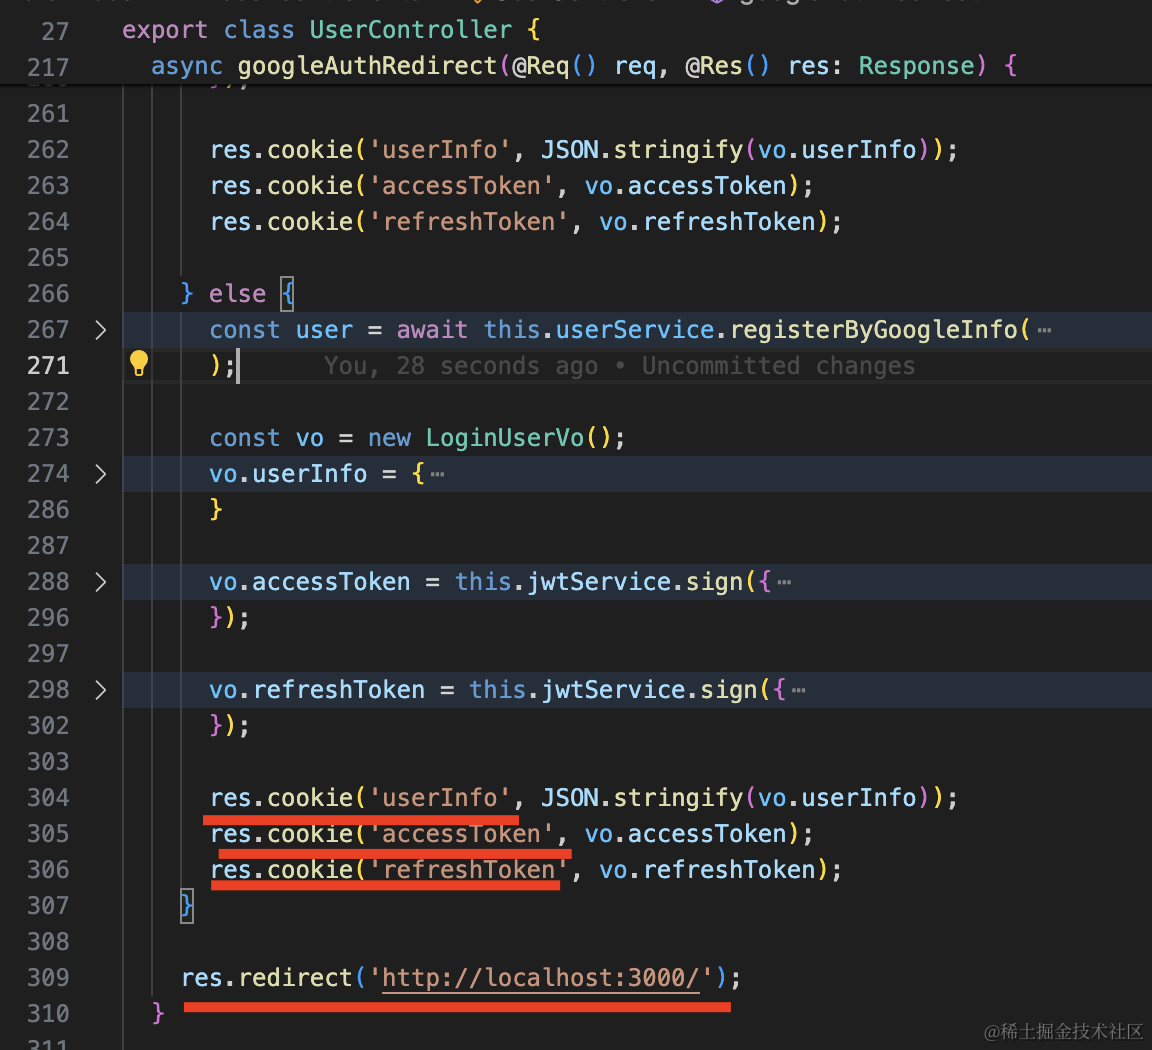
在 callback/google 里注入 Response,设置 cookie:
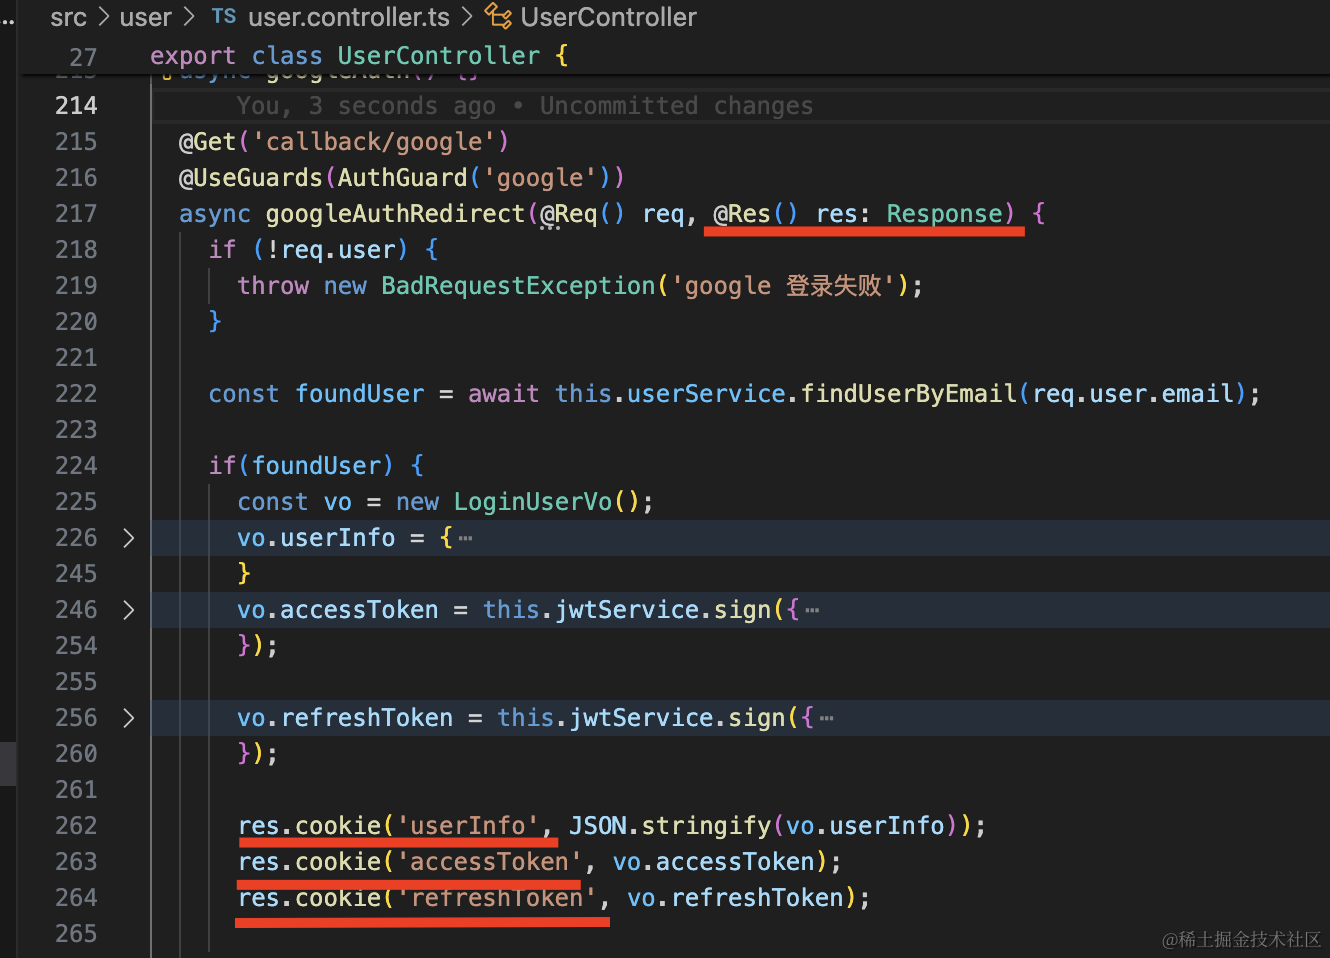
然后重定向:
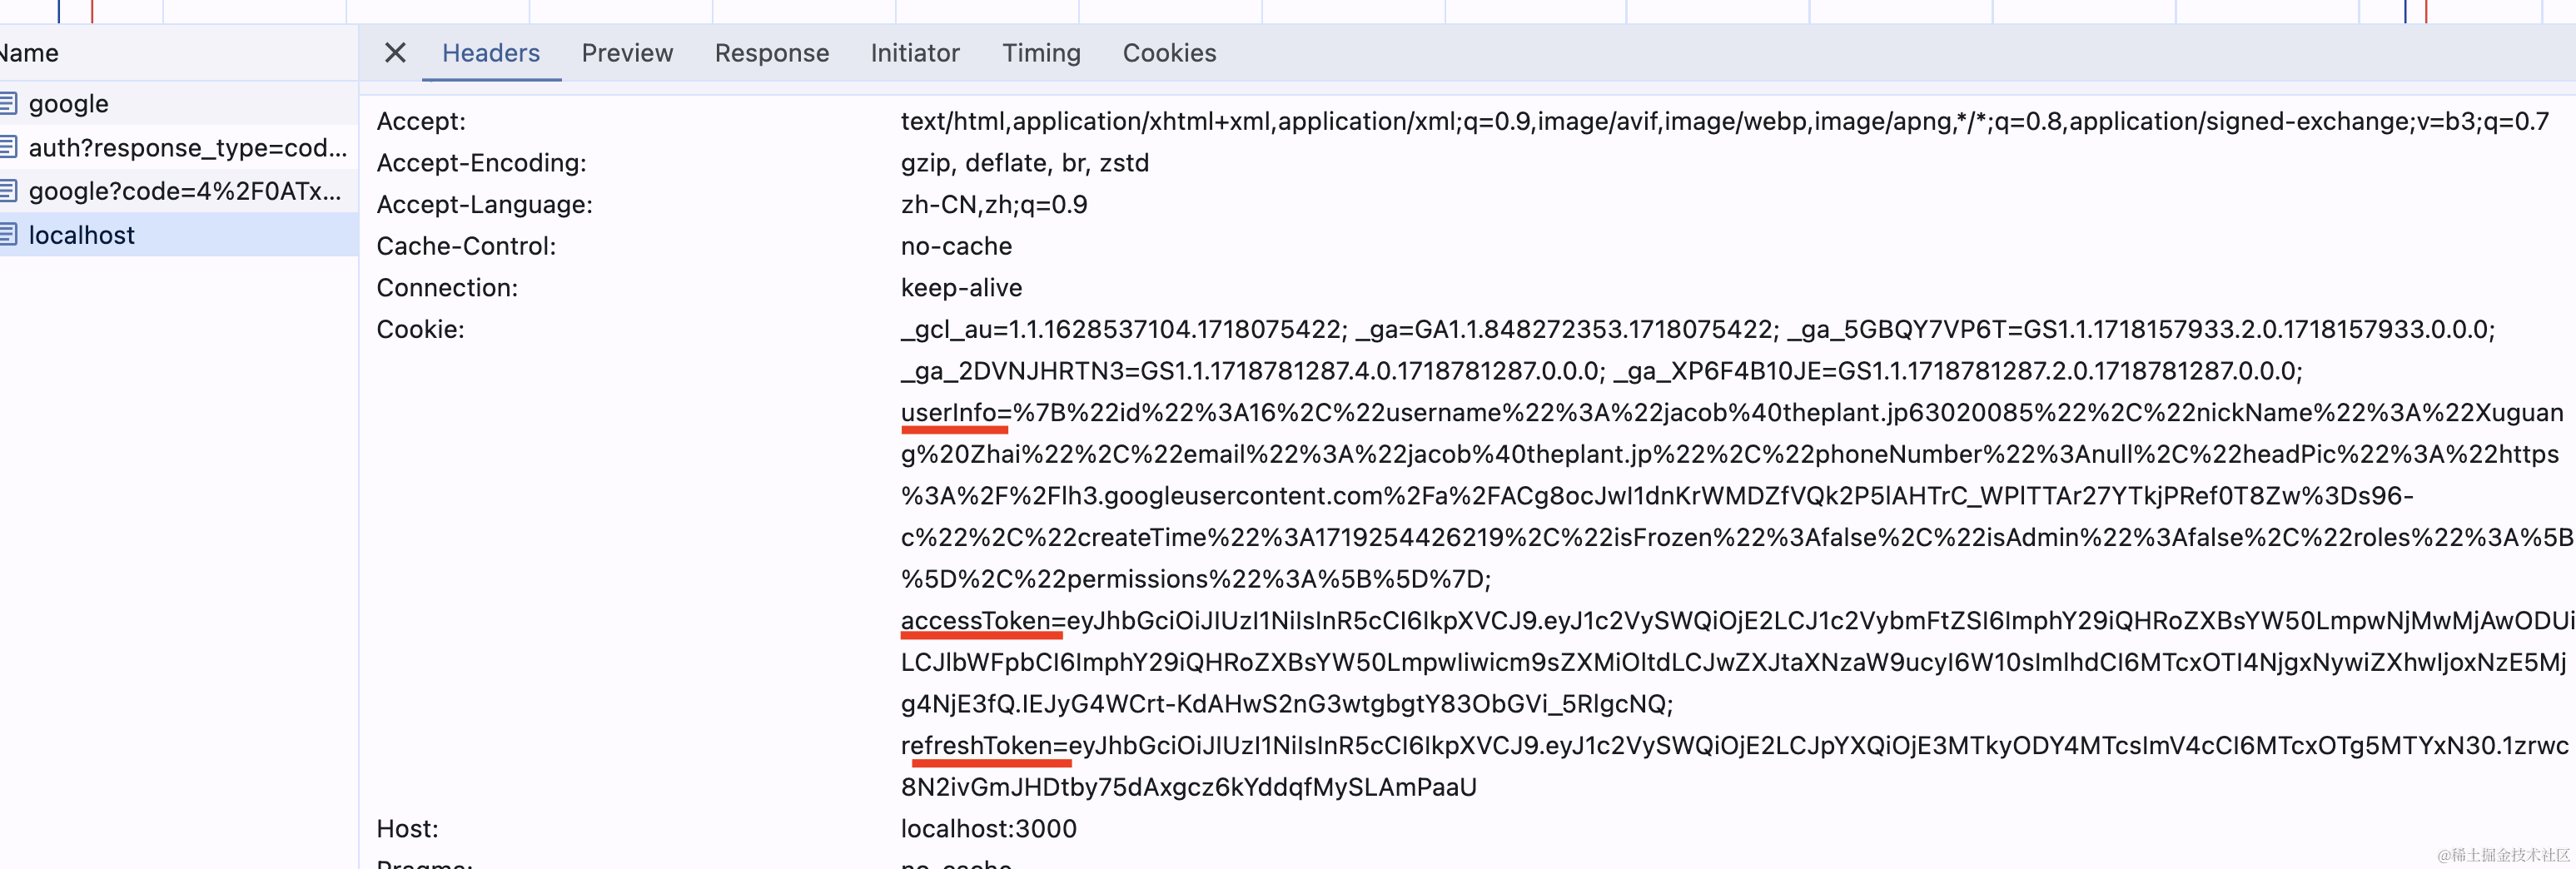
试一下:
重定向没问题。
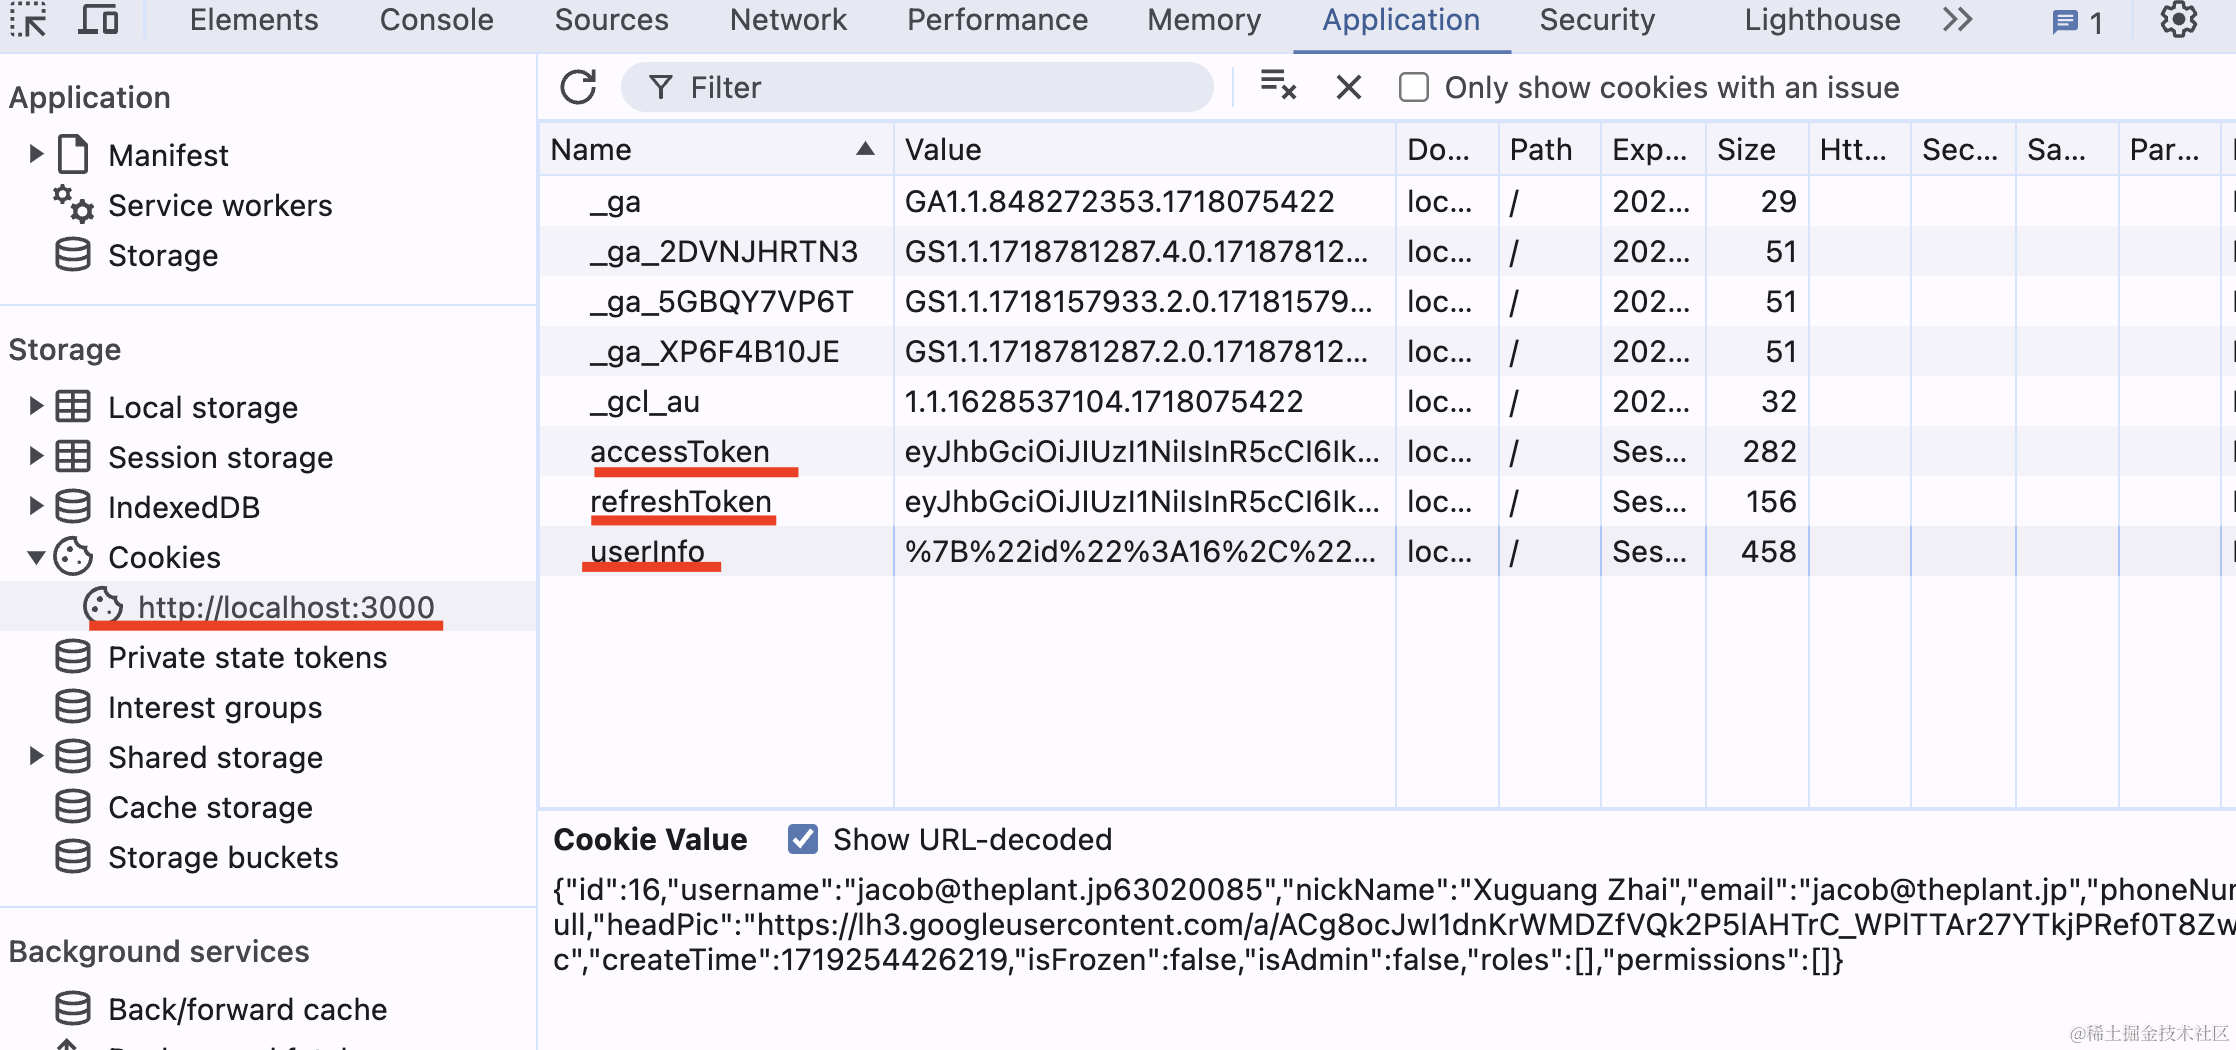
cookie 也没问题:
此外,我们还要处理下普通的登录,用户名密码登录的时候要过滤下 loginType:
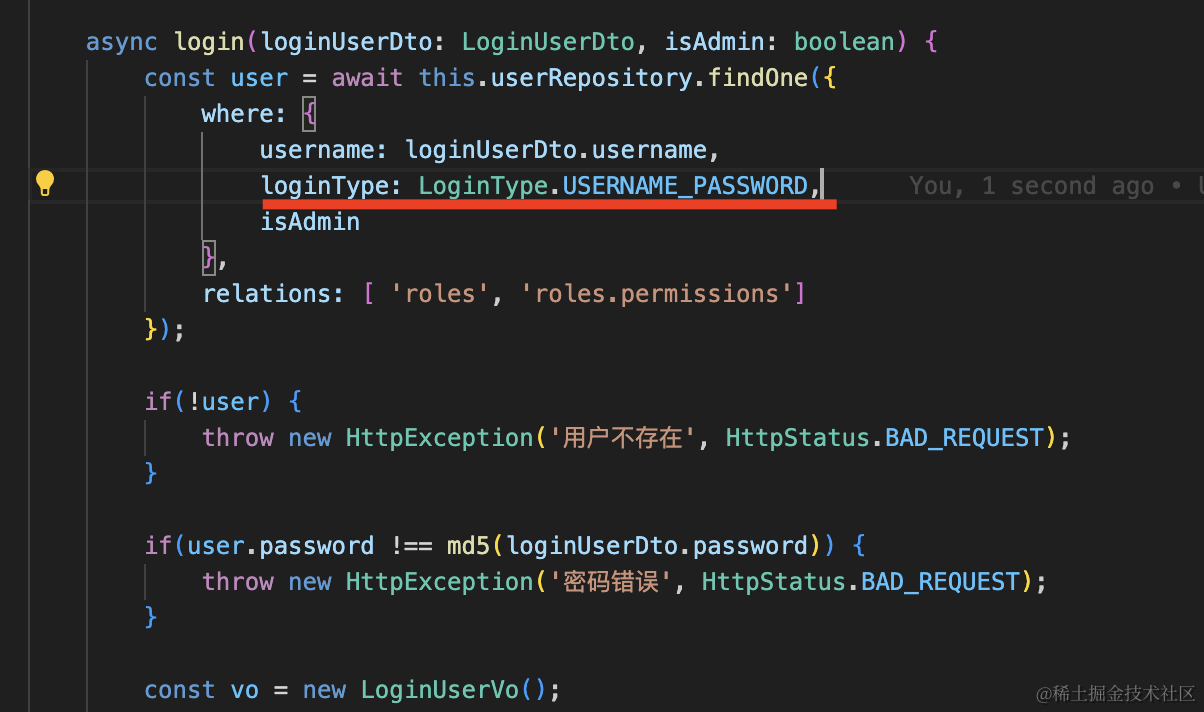
google 登录的账号是不能通过用户名密码登录的。
这样,google 登录的后端部分就完成了。
案例代码上传了小册仓库
总结
我们的应用之前只支持用户名密码登录,今天实现了 google 登录的后端部分。
首先我们把用户名密码的身份认证改成了用 passport。
当然,这不是必须的,每个策略都是可以独立用的。
然后我们创建了新的 google 应用,拿到 client id 和 client secret。
用 passport-google-oauth20 的策略来实现了 google 登录。
在 callback 的路由里,基于 google 返回的信息做了自动注册,如果用户已经注册过,就直接返回登录信息。
google 登录的 callback 里重定向到网站首页,然后通过 cookie 携带 userInfo、accessToken、refreshToken 等信息。
前端代码再处理下 cookie,同步登录状态就好了。